If your grow tent is the plant version of a nightclub, mold is the grim bouncer that never left. It loves high humidity, stale air, wet leaves, and sloppy hygiene. The fix is not a bigger fan pointed at your problems. It is control. Control of relative humidity when lights are on and off. Control of airflow so your tent runs under slight negative pressure. Control of irrigation and leaf wetness. And control of how spores move so your tent doesn’t gas your home with funk. Here’s how to build hydroponic biosecurity like you actually mean it, with tips I use when I’m called in to test and clean up moldy grow rooms that went feral.
What Is A Negative Pressure Grow Tent?
A negative pressure grow tent is a tent where the exhaust airflow is a little higher than the intake airflow. That small pressure difference makes air want to move into the tent through your planned intake points and filters instead of leaking out of every pinhole and zipper seam. The payoff is twofold: you keep tent odors and spores from drifting into the rest of the house, and you also pull makeup air from known, cleaned, or filtered sources instead of from the musty corner behind your dryer.
In practice, you slightly oversize the exhaust fan relative to the intake. Many growers run a powered exhaust and a passive intake by opening the lower tent flaps and letting the fan do the work. You’ll know you nailed it if the tent walls pull in a bit like a vacuum bag and you can feel air being drawn inward at the intake ports. Community growers have leaned on this approach for years because it works for odor and spore control when it’s set up carefully. See grower discussions on setting negative pressure with passive intakes and stronger exhaust fans here: r/GrowBuddy.
Why Hydroponic Biosecurity Matters
Hydroponic biosecurity is about preventing pests, spores, and waterborne pathogens from getting in, spreading around, and setting up a lease. Hydro systems are fantastic for speed and yield, but they’re also great highways for microbes. High humidity and dense canopies increase the odds of powdery mildew and bud rot, and warm nutrient solutions are basically a spa day for Pythium. Once spores take hold, they hitch rides on air currents, duct seams, your clothes, and yes, your adorable cat that loves the tent. Keeping tight environmental control and smart containment protects your plants and keeps the rest of your home from turning into a mold taste test.
RH Targets For Lights On vs Lights Off
Plants need moisture, mold needs moisture, and they’re constantly arm-wrestling for it on your leaves. Your job is to give plants what they want while starving fungus of what it craves. That starts with realistic RH targets that shift with the light cycle and growth stage.
During lights-on, aim for roughly 40 to 60 percent RH in most stages. As you push into late flowering, many growers ratchet RH down into the 30 to 40 percent range to reduce the risk of botrytis and bud rot in dense flowers. These targets line up with common grow guidance and practical experience in small tents and rooms. See humidity control basics for tents from HydroGardenGeek and Hydro Growing Systems.
During lights-off, temperatures drop, and RH rises even if you didn’t add a single drop of water. That swing can push you into condensation territory on cool tent fabric, ducting, and leaves. Keep night RH from drifting over your day targets with a combination of steady air circulation, careful watering timing, or a small safe heat source to narrow the temp drop. Growers frequently report nightly RH jumps, so watch your overnight graphs and react early, not when you see dew on the walls. Example discussions: r/GrowBuddy.
If you like to manage by numbers, think in terms of vapor pressure deficit too. In veg, most home grows are comfortable in a moderate VPD window; in flower, especially late, a higher VPD makes mold less comfy. You don’t have to obsess. Just keep RH conservative as the canopy thickens and buds bulk up. Stage guidance and ranges are summarized well by Advanced Nutrients.
| Stage | Lights-On RH | Lights-Off Planning | Notes |
|---|---|---|---|
| Vegetative | 45 to 60 percent | Expect a rise of 5 to 10 percent | Keep air moving through the canopy |
| Early Flower | 40 to 55 percent | Control swings to prevent condensation | Thin interior leaves to reduce microclimates |
| Late Flower | 30 to 45 percent | Keep night RH closer to day RH | Prioritize mold prevention over humidity-loving growth tactics |
Side note for the rest of your home: general indoor mold prevention targets sit around 30 to 50 percent RH, which is also where many homes feel comfortable year-round source. If your tent setup is driving the whole house to 65 percent RH, you’re turning your drywall into a snack bar. Rein in the tent before you have a larger problem.
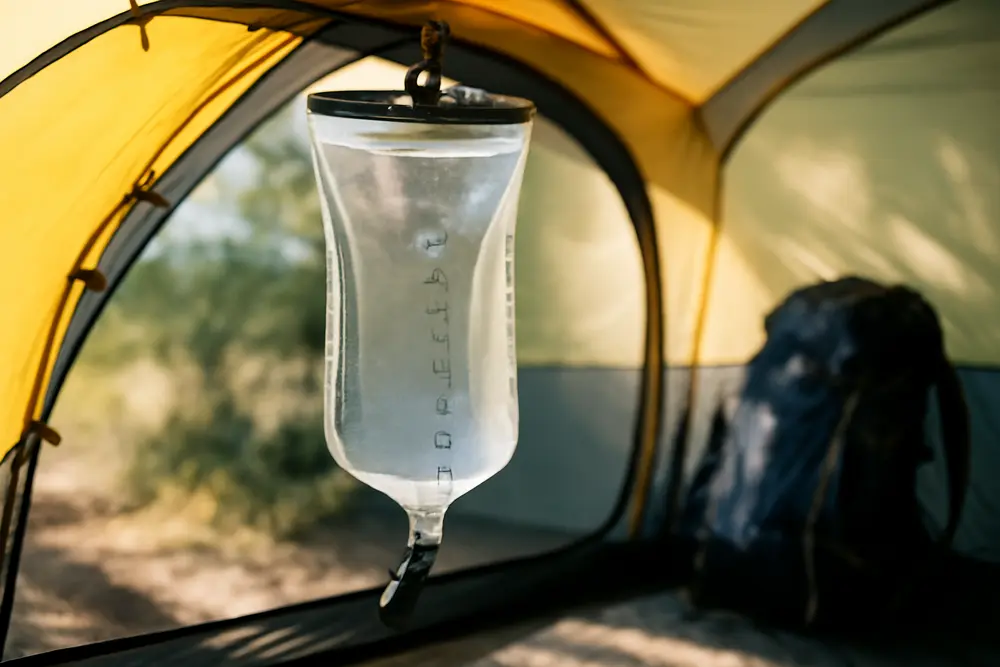
Airflow And Ventilation Setup
Airflow is how you exchange wet, stale air for fresher, drier air and how you break up the still pockets where moisture hangs around leaves. It is not optional. It is the difference between happy stomata and a fuzz party on your stems.
Inside the tent, run at least one oscillating or clip fan sweeping across the canopy and another moving air below it. You want leaves to jiggle, not to perform a wind tunnel audition. Gentle, uniform movement erases microclimates where RH spikes, especially where leaves overlap. Hydro tent humidity pointers from HydroGardenGeek cover this nicely.
For tent ventilation, set up a powered exhaust, plus either a powered intake at a lower CFM or passive intake flaps cracked open down low. Place the exhaust high because heat and moisture rise. Route ducting with smooth curves, not sharp, kinked bends that choke airflow. A short duct run improves performance and reduces places for condensation to form.
To establish negative pressure:
- Size your exhaust fan a bit larger than the intake capacity.
- Open lower passive intake flaps or ports, keeping them screened and, ideally, prefiltered.
- Mount the exhaust carbon filter and fan inside the tent if possible to capture particulates before they reach duct seams.
- Check for that slight inward tent wall pull and confirm with a tissue test at seams and zippers.
When RH is stubborn, your best friends are a dehumidifier outside the tent conditioning the makeup air and smart watering. If you must run a humidifier, keep sustained RH under 60 percent and measure multiple times per day as conditions and plant transpiration change source.
Hygiene And Irrigation
Leaf wetness is the mold world’s RSVP. Most foliar diseases need free water on the surface to germinate. So don’t give it to them. Water early in the light period so the canopy and medium can shed moisture before night. Avoid watering in the last few hours before lights out. Hydro tent guides consistently push this because it works source.
Drip irrigation or bottom watering beats splashing from above. If you must foliar feed, do it sparingly, with strong airflow, and only when lights are on and intensity is dialed down to avoid leaf burn.
Between uses, clean and sanitize trays, domes, pumps, airstones, and reservoirs. Tools and shears should get wiped with 70 percent isopropyl. For irrigation gear, growers use greenhouse-safe disinfectants labeled for non-food-contact rinse or follow label directions for rinse requirements. The point is consistency and contact time. Dirty reservoirs are where root diseases like Pythium find joy. Greenhouse growers hammer on this because they see the losses firsthand source.
Keep nutrient solution temperatures in a sane range. Warmer water holds less dissolved oxygen and encourages pathogens. Many hydro growers target the mid 60s Fahrenheit. Aeration with a clean airstone and lid coverage reduces biofilm growth. If a plant looks like it’s rotting or going downhill fast, don’t let it marinate in the tent’s micro-ecosystem. Remove it before it becomes a spore fountain.
Filters, Ducts, And Tent Integrity
Filtration and duct work are where many home grows get lazy. Don’t. If you’re serious about hydroponic biosecurity, treat airflow hardware like medical gear that lives around your plants and your lungs.
Carbon filters are fantastic at odor and VOC control. They also capture some dust, but they aren’t HEPA filters. If you care about real spore capture on exhaust or intake, add a HEPA stage or use a carbon-can with a high-quality prefilter and service it on schedule. Here’s a simple rule: if your prefilter looks like a sweater, your spores are not staying where you think they are. Basic mold filtration concepts and maintenance reminders are covered by indoor air pros like Howard Environmental.
On ducting, fabric duct options used in commercial grow facilities resist condensation, can be laundered, and often include antimicrobial treatments. They are also easier to route without creating moisture traps that form in ribbed metal joints. If you run rigid or flex metal duct, audit for sags, low points, and crushed bends where water can condense and hang out. Industrial grow applications for fabric ducts are reviewed by DuctSox.
Tent integrity matters more than most people think. Inspect zippers, seams, and unused ports for leaks. Light leaks are air leaks. Use weather tape or foam gaskets to tighten sloppy spots. A negative pressure system only works if the tent is more or less a tent, not a suggestion of a tent.
Protecting The Rest Of Your Home
Your tent should not be a spore sprinkler for your living room. Negative pressure is your main containment tool. Exhaust air should pass through a filter setup and then exit to a safe location. If you’re venting outdoors, use a backdraft damper and a screened termination hood to keep critters and wind-driven moisture out. Seal the duct-to-wall connection properly so exhaust doesn’t blow back into hidden cavities and condense.
Inside the house, keep the tent area clean like a mini lab. No piles of laundry, no open soil bags, and no traffic in and out with yard shoes. If the tent shares air with a central HVAC return, consider closing that return while the tent is running or filtering the return with higher-MERV filtration. The goal is simple: your tent air stays in the tent path, and your home air stays boring.
Monitoring And Early Detection
Sensors are not optional decoration. Put a reliable RH and temperature sensor at canopy height, not just strapped to a tent pole near the roof. Place a second sensor low in the tent since cool, humid air settles. Watch lights-on vs lights-off patterns. If you see a nightly 15 percent RH jump, you have work to do now, not after you smell trouble.
Daily look-for list: free water on leaves, condensation on tent walls or ducts, leaf spotting, powdery residues, musty smells when the fan kicks on, and any sudden wilt or discoloration at the base of stems. These are tripwires. If your tent struggles with recurring mold, consider professional air sampling or surface testing to confirm what species you’re fighting and whether it moved into the house. That is when an indoor air specialist earns their fee.
Grower Checklist
Use this as a quick pulse check when the canopy gets dense and the clock is ticking.
- Set RH targets by stage: 45 to 60 percent in veg, 40 to 55 percent early flower, 30 to 45 percent late flower.
- Keep lights-off RH close to day RH. Add circulation or slight heat to stop big night spikes.
- Run a negative pressure grow tent: stronger exhaust than intake, passive lower intakes open, tent walls pulling in slightly.
- Place at least two fans for gentle, uniform movement above and below the canopy.
- Water early in the light cycle. Avoid drenching before lights out. Prefer drip or bottom watering.
- Sanitize tools and irrigation gear routinely. Keep reservoirs clean and covered.
- Service filters on schedule. Pair carbon with HEPA or quality prefilters if spore control matters.
- Audit ducts and tent seams for leaks, sags, and condensation traps.
- Keep the tent area clear of clutter. Control what air the tent breathes and where exhaust goes.
- Log RH and temperature. Hunt for patterns. Fix swings before fungus RSVPs.
Setting Up Negative Pressure
Here’s a practical template you can copy without reinventing the wheel:
Choose an exhaust fan rated for the tent volume plus extras for duct losses and filters. As a loose example, a 4 x 4 x 6.5 foot tent is roughly 104 cubic feet. If you want 20 to 30 air changes per hour in a small tent, that suggests 35 to 50 CFM of net airflow, but once you add a carbon filter and a few bends, you’ll want more overhead. Most growers pick a 4 or 6 inch inline exhaust fan, then use a weaker powered intake or no powered intake at all. Crack the lower intake flaps and add a clip-on prefilter to stop dust and pet hair from becoming leaf confetti.
Place the carbon filter inside the tent near the top, connect it to the inline fan, and route the exhaust out. Keep the duct run short and smooth. If you need silencing, add a muffler can to the exhaust side. Turn it on and confirm the tent pulls inward. If not, reduce intake opening or bump the exhaust speed. Negative pressure should be small and steady, not hurricane mode. You are containing and exchanging air, not inflating an air mattress.
Hacks That Actually Help
Use a dehumidifier to prep the room air that feeds the tent intake. Dry source air makes tent RH control much easier. If the dehu warms the room too much, bleed some cool air in or run it on a smart plug.
Stage your watering to match plant transpiration. Heavier watering when the lights and fans are already drying the canopy, lighter feeding as you approach lights-off. If you stir the reservoir, do it with clean gear, not the mystery stick in the corner.
Give your ducts a spine. Support long flex runs with straps so they don’t sag into moisture pockets. If you see droplets in a low spot, you just found a condensation trap that can grow mold on dust.
Trim with intention. A little thinning of interior leaves improves airflow and helps humidity escape the jungle. Do not go wild and stress the plant right before late flower. Target leaves that form layers and trap air deep in the canopy.
Common Mistakes To Avoid
Cranking a humidifier without a plan. Ultrasonic units can throw minerals and jump RH. Keep sustained RH under 60 percent and track it multiple times per day as recommended by air quality pros source.
Watering late. Wet media and leaves going into a cool, dark period is a mold welcome mat. Just stop doing it.
Leaving filters forever. Carbon and prefilters load up and strangle airflow long before they stop smells. Set calendar reminders and replace or clean on schedule.
Ignoring the rest of the house. If your tent RH control floods the home with damp air, you’ll grow a different kind of crop in wall cavities. Keep household RH 30 to 50 percent where possible source.
FAQ
What should my RH be in late flower?
Aim for roughly 30 to 45 percent during lights-on in late flower. Keep the dark period from spiking much higher. Many growers tighten to the 30 to 40 percent band to reduce botrytis risk in dense buds. See practical ranges from Hydro Growing Systems and stage discussions at Advanced Nutrients.
How do I know if my tent is under negative pressure?
The sides of the tent should pull slightly inward when the exhaust runs. Hold a thin tissue near zippers and ports; it should pull inward, not flutter outward. If it blows out, reduce intake opening or increase exhaust speed.
Do I need HEPA if I already have a carbon filter?
Carbon filters are excellent at odor and VOCs and they catch some dust, but spores are best controlled with HEPA or a high-quality prefilter in addition to carbon. If spores are a big concern, pair carbon with HEPA or run a HEPA unit that conditions intake air for the tent. Maintenance matters more than the label on the box.
Why does my RH spike at night?
Plants transpire less when lights go off and air cools down. Cooler air holds less moisture, so RH jumps. Add gentle circulation, reduce late watering, and consider a small, safe heat source or a dehumidifier on a controller to narrow the swing. Watch overnight sensor data so you can tune it before condensation appears.
What’s the best way to sanitize hydro gear?
Clean first with soap and water to remove biofilm, then use a greenhouse-safe disinfectant according to label directions, or wipe tools with 70 percent isopropyl. Rinse as directed. Keep reservoirs covered, airstones clean, and replace tubing that looks stained or slimy. For pathogen risks like Pythium, greenhouse resources stress strict cleaning between runs source.
Should I exhaust outdoors or keep it indoors?
If odor and spores are a concern, exhausting outdoors after filtration is great, provided you use a backdraft damper, proper sealing, and a screened termination. If you must keep it indoors, be extra careful with filtration and household RH control so you don’t spread moisture and spores through shared air or HVAC.
Are fabric ducts worth it in a small tent?
For most hobby tents, flex duct is common and fine if it’s supported and kept dry. Fabric ducts really shine in larger rooms because they resist condensation, can be laundered, and distribute air more evenly. If you do use metal or flex, avoid sags and joints that trap moisture. Commercial grow facility notes are outlined by DuctSox.
Can I just crank more fans to fix mold?
Airflow helps, but it won’t fix bad RH targets, sloppy watering, or filthy irrigation gear. Mold control is a bundle: RH control, airflow, sanitation, and containment. Treat all four like they matter, because they do.