
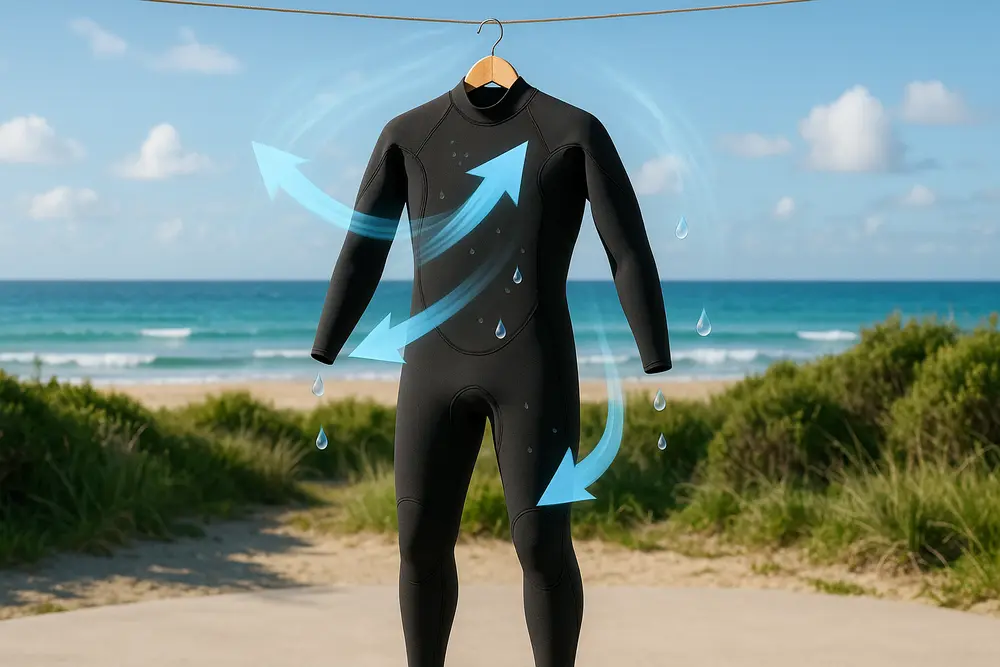
Good wetsuit drying starts before the suit ever reaches a hanger. If salt, chlorine, sweat, sunscreen, sand, and skin oils remain trapped in the lining, you’re hanging up a wet collection of odor-friendly residue. The better routine is simple: rinse promptly, drain without wringing, dry the inside first, turn the suit right-side out, inspect the hidden areas, and store it only when it’s completely dry. That’s practical neoprene care, not a miracle-cleaner sales pitch.
Why Damp Wetsuits Start to Smell
Moisture is the condition you can control most reliably. Both the U.S. Environmental Protection Agency and the Centers for Disease Control and Prevention emphasize moisture control as the foundation of mold prevention. Their guidance isn’t specific to wetsuits, so there’s no honest basis for claiming that every damp suit becomes moldy after a particular number of hours. The useful principle is simpler: wet materials shouldn’t remain wet longer than necessary.
A used wetsuit provides plenty of material for odors to develop. Sweat, body oils, stagnant water, sunscreen, organic debris, and residue from a contaminated gear bag can all contribute. Warmth and poor airflow make matters worse. That explains why the trunk of a car, a sealed plastic tote, or a humid bathroom can turn yesterday’s session into tomorrow’s nasal ambush.
An unpleasant smell doesn’t automatically prove that mold is present. Bacteria, body oils, urine, incomplete rinsing, and stagnant water can produce strong odors without visible mold growth. A musty smell is still worth investigating, especially when it returns after cleaning or affects several pieces of equipment. Just don’t pretend your nose is a laboratory.
Rinse Before You Dry
Prompt freshwater rinsing removes substances that can contribute to odors or damage gear over time. Ocean use leaves salt and sometimes sand. Pool use leaves chlorine and still involves sweat and skin contact. Lakes, rivers, docks, boats, and changing areas can add silt or other residue. Every type of use deserves a rinse, even when the exterior looks clean.
Use Fresh, Cool Water
Use cool or comfortably lukewarm fresh water unless your suit’s manufacturer directs otherwise. Very hot water isn’t needed and may be hard on the suit’s foam, lining, adhesives, seam tape, liquid seam seals, or elastic components. Modern wetsuits don’t all use the same materials, so the care label gets the deciding vote.
Before rinsing, secure hook-and-loop tabs so they don’t grab and roughen the lining. Open the main zipper enough to let water circulate. Rinse the exterior, then carefully turn the suit inside out and flush the torso, sleeves, legs, collar, cuffs, zipper flap, and internal folds. If there’s an attached hood, pocket, or tucked-over panel, give it individual attention.
Don’t yank the suit inside out by a cuff, neck seal, or zipper flap. Work it over gradually, supporting the material as you go. Sand around a cuff or zipper should be rinsed away gently rather than ground into the fabric.
Use the Right Cleaner When Needed
A freshwater rinse is routine maintenance, while occasional washing is a more thorough job. When a suit has persistent ordinary odor or visible residue, use a cleaner identified as compatible with wetsuits or the specific suit material. Follow the care label and cleaner directions for dilution, soaking, rinsing, and drying.
Household chemicals aren’t automatically better because they’re stronger. Bleach, harsh detergents, solvents, and random deodorizing mixtures may affect foam flexibility, bonded seams, lamination, printed finishes, zipper components, or skin comfort. Never combine cleaning chemicals. If online advice promises that one kitchen ingredient safely kills everything on every wetsuit, skepticism is your friend.
General care information from REI, PADI, and Patagonia supports gentle cleaning, prompt rinsing, proper drying, and manufacturer-led care. Manufacturer instructions should take priority because foam formulations, linings, seam systems, and adhesives vary.
The Best Wetsuit Drying Method
Effective wetsuit drying is a sequence, not the act of tossing the suit over the nearest shower rod and hoping for character development. The inside normally deserves first access to moving air because it has the most contact with sweat, skin oils, and trapped water.
- Let the suit drain without wringing it. Hold or position it so gravity can remove excess water. You may lightly press a section if the care instructions allow it, but don’t twist the whole suit like a towel.
- Turn it inside out carefully. Smooth open the torso, sleeves, legs, cuffs, and zipper flap so damp surfaces aren’t stuck together.
- Support the wet weight. Use a wide wetsuit hanger, a broad padded hanger, or a smooth horizontal bar that allows the suit to drape at the waist.
- Choose shade and airflow. Give the suit space on both sides in a moderately warm, ventilated location. A low-speed room fan can help circulate air without blasting the material with heat.
- Reposition trapped areas. Open folded cuffs, separate overlapping panels, and shift the waist fold if it’s holding moisture.
- Turn it right-side out. Once the inner lining is dry or nearly dry, turn the suit carefully and let the exterior finish.
- Inspect before storage. Feel the collar, armpits, cuffs, crotch, zipper base, seam junctions, knee panels, pockets, and any section that rested against a bar.
There’s no universal drying time. Suit thickness, lining, humidity, airflow, indoor temperature, and attached accessories all affect the process. A thin suit in a breezy room may dry much faster than a thick cold-water suit in a humid bathroom. Use the suit’s condition, not an arbitrary countdown, to decide when it’s ready for storage.
How to Hang Without Harming Seams
A soaked wetsuit is heavy. Hanging all that weight from a narrow wire hanger concentrates stress at the shoulders, neck opening, and upper seams. Over time, that can stretch panels or place unnecessary strain on bonded and stitched areas. Hanging the suit from the neck is worse, particularly when the neck seal is thin or carefully fitted.
A wide wetsuit-style hanger distributes weight across a broader area. A broad padded hanger may also work when it’s sturdy, smooth, and compatible with the manufacturer’s instructions. For heavier suits, draping the suit at the waist over a clean, rounded horizontal bar can reduce shoulder stress.
The waist-drape method has its own catch: overlapping material can hold water. Use a sufficiently wide, smooth bar, avoid a sharp crease, and periodically reposition the suit so the fold receives airflow. Make sure the bar isn’t rusty, dirty, painted with a transferable coating, or positioned where the suit drags on the floor.
Seam-safe hanging also means no aggressive wringing. Twisting can strain glued seams, blind stitching, internal tape, liquid seals, zipper bases, and stretch laminates. Gravity is slower than brute force, but it doesn’t send your suit shopping for a repair kit.
Drying Mistakes That Hold Moisture
The most common mistake is leaving a wet suit in its gear bag until later. Sometimes “later” becomes tomorrow, particularly when the bag is in a warm vehicle. If you can’t perform a full wash immediately, get the suit out of the sealed bag as soon as practical and place it where it can drain safely.
Drying only the exterior is another frequent failure. The outer panels can feel dry while the inner crotch, cuffs, collar, zipper flap, or seam intersections remain damp. Thick linings and overlapping panels deserve a manual check before the suit goes into storage.
High heat isn’t a clever shortcut. Clothes dryers, radiators, space heaters, high-heat hair dryers, and other intense heat sources may affect foam, adhesives, laminates, and elasticity. Prolonged direct sun can also age materials. Shade with moving air is usually the safer approach unless the manufacturer gives different instructions.
An unventilated shower isn’t necessarily a good drying station. A suit may hang correctly and still dry poorly if the room stays humid after bathing. Cracking a door, running suitable ventilation, or moving the suit to a drier location can make more difference than buying an elaborate hanger.
Don’t place boots, gloves, or a hood inside the wetsuit to keep the gear together. That’s tidy in the same way that sealing leftovers while they’re still steaming is tidy. You’re trapping moisture exactly where you don’t want it.
Dry Accessories Separately
Boots, gloves, and hoods often dry more slowly than the main suit because their openings are small and their toes, fingertips, and seams receive limited airflow. Rinse each item separately, drain it opening-down at first, then reposition it so air can reach the interior.
Turn an accessory inside out only if its construction and care instructions allow it. Forcing a thick boot or glove inside out can strain seams and bonded panels. Instead, gently open the cuff and arrange the item so air can circulate. A low-speed fan at a reasonable distance may help, but heated or forceful airflow isn’t necessary.
Check the toe box, fingertips, hood crown, chin area, and folded cuffs before storage. A dry wetsuit stored beside damp boots is still being stored with a moisture source. The same applies to wet towels, buoyancy equipment, and the gear bag itself.
Store Only When Fully Dry
“Dry to the touch” can be misleading. Neoprene and other wetsuit materials may have dry outer fabric while thicker seams and concealed lining remain cool or clammy. Feel the suit with dry hands and compare suspicious areas with panels you know are dry. If a section feels heavier, cooler, or damp, give it more time.
Store the suit in a cool, shaded, ventilated location away from heaters, direct sunlight, gasoline, paint, solvents, and other harsh chemicals. Don’t compress it under tanks, weights, bins, or piles of other equipment. Avoid storing it tightly folded unless the manufacturer recommends that method.
For long-term storage, follow the manufacturer’s directions on hanging versus laying the suit loosely flat. A wide hanger may be suitable for one suit, while a very heavy model may benefit from another supported position. Tight folds can create creases, but lengthy hanging from inadequate support can distort shoulders.
The gear bag needs the same basic treatment. Empty it, remove sand and debris, clean it according to its label, and let it dry fully. Returning a freshly washed suit to a damp, odor-filled bag is less a storage strategy and more a sequel.
When a Wetsuit Smells Musty
If there’s odor but no visible growth, begin with the least aggressive approach. Rinse the suit thoroughly, then wash or soak it according to its care label using an approved cleaner. Pay attention to the inside lining, zipper flap, collar, cuffs, and crotch. Rinse again if the product instructions require it, then dry both sides completely. Clean and dry the bag, boots, gloves, hood, and storage surface at the same time.
If you see fuzzy material, spreading spots, recurring discoloration, or obvious growth, isolate the suit from clean gear. Don’t hold it against your face for a heroic smell test. People with asthma, mold allergies, immune suppression, or chronic lung conditions may be more sensitive to mold exposure, so additional caution is reasonable.
Visible suspected mold isn’t a cue to start mixing disinfectants. Check the manufacturer instructions or contact the manufacturer for treatment guidance. Avoid aggressive scrubbing that could abrade the lining or damage seams. If growth is extensive, returns after suitable cleaning, or accompanies crumbling foam, seam failure, delamination, or loss of flexibility, replacing the suit may be more sensible than repeatedly treating deteriorated gear.
No cleaner can fix a suit that’s repeatedly returned to a damp bag or humid closet. Cleaning addresses residue on the equipment. Moisture control addresses why the problem keeps coming back.
When the Storage Area Is the Problem
If one neglected wetsuit smells, start with the wetsuit and its bag. If several suits, towels, boots, bags, or other stored items repeatedly become musty, inspect the room. Condensation, plumbing leaks, wet flooring, poor ventilation, damp drywall, humid garage air, exterior water intrusion, and faulty air-conditioning or dehumidification can keep the entire storage area damp.
Look around and behind storage racks, along exterior walls, near plumbing, and beneath wet gear. Don’t place dry equipment against a wall that feels damp or shows staining. Move clean gear away from the affected area while the moisture source is investigated.
A room-level moisture problem won’t be solved by washing the wetsuit for the fifth time. When musty odors persist throughout the storage area, visible growth appears on building materials, or the moisture source isn’t obvious, a qualified mold and moisture inspection can help identify conditions beyond the equipment itself.
Mold-Free Wetsuit Checklist
- Rinse promptly with fresh, cool water.
- Flush the inside, cuffs, collar, folds, and zipper area.
- Remove sand and debris without pulling at seams.
- Drain the suit without twisting or wringing it.
- Begin wetsuit drying with the suit inside out.
- Use a wide hanger or a smooth waist-drape setup.
- Choose shade, moderate temperature, and moving air.
- Turn the suit right-side out to finish drying.
- Check seams, cuffs, pockets, and folds for dampness.
- Dry boots, gloves, hoods, towels, and the bag separately.
- Store the suit only when every area is completely dry.
- Investigate the room if musty odors keep returning.