
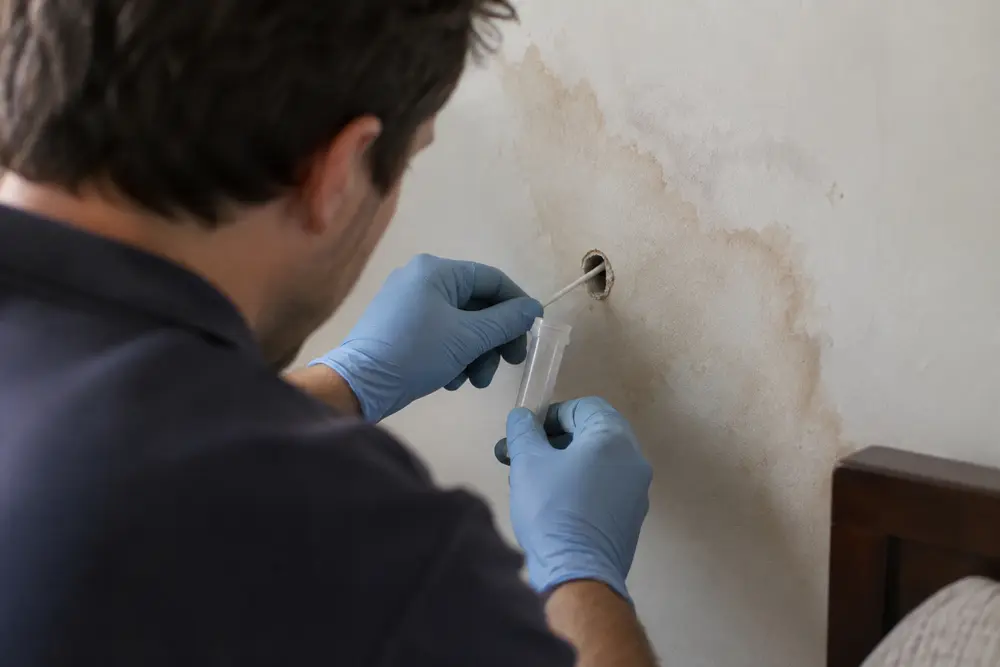
Most people see a brown stain, put a moisture meter directly over it, and assume the highest reading marks the place to drill. That shortcut can miss the actual water path and leave you with a damaged wall plus a weak sample. Useful wall cavity mold sampling starts by asking why that particular wall bay deserves your attention, especially when you suspect mold inside a wall cavity but can’t see growth on the finished surface.
Step 1: Read the Stain and Its History
Your first step is documenting the wall before anyone opens it. Where the stain sits and how its surface looks can point you toward a source. A mark below a window means something different from paint damage beside a shower valve, even when both look similar at first glance. Your timeline matters just as much as the stain. Did the mark appear after heavy rain? Does it darken when an upstairs fixture is used? Was the wall painted after a previous leak? Those answers help you separate an active moisture problem from old cosmetic damage. Photographs should capture the overall wall and a closer view of the affected finish, giving your inspector a record of conditions before access and connecting later findings to an exact location. The NIOSH assessment tool for damp buildings puts visible water damage and odors at the center of the investigation. The laboratory comes later.
Step 2: Map the Probable Water Path
Compare the Suspect Area With the Rest of the Wall
To map your wall properly, the inspector should scan a pattern rather than focus on one dramatic spot. Readings from the suspect area are compared with readings from similar material that appears unaffected. That comparison matters because different wall finishes can respond differently to the same instrument.
When one area reads higher than comparable material, you’ve found an anomaly rather than proof of mold. The reading doesn’t automatically identify the leak source, either. Anyone selling you a moisture-meter number as a mold diagnosis is getting well ahead of the evidence.
Follow a Route That Fits the Building
Once your inspector finds an anomaly, the investigation works back toward plausible sources. A stain below an exterior window could involve the window assembly or an exterior penetration. Damage beside your bathroom may point to supply or drain components hidden on the opposite side. Roof transitions and condensate equipment can create their own less-obvious paths.
Because water doesn’t always travel straight down, it may follow framing before reaching the painted surface. The darkest portion of your stain could be several inches away from the wall bay that received the most moisture.
During a careful mold inspection in Austin, your inspector uses the building layout and moisture pattern together. Thermal imaging or a borescope may provide useful information, but neither tool magically sees mold through your wall. Each one supports a moisture-path hypothesis that still has to make physical sense.
Step 3: Choose the Best Wall Bay
The best wall bay is usually where the probable water route matches an abnormal moisture pattern, provided access is practical. A sample point that risks striking plumbing or wiring isn’t made smart merely because it sits over your stain. Consider a stain spanning two stud bays beneath a window. If meter readings are normal in the bay below the visible center while the adjacent bay shows an anomaly aligned with one lower window corner, the adjacent bay may be your more informative target. In that location, the construction details support water entering near the corner and spreading across the finish.
Making random exploratory holes usually creates needless repair work and more opportunities to introduce surface dust into your cavity sample. Extra holes don’t guarantee you a better answer. One defensible location can tell you more than several poorly chosen ones, although your inspector may recommend further opening when the evidence suggests a broader problem.
Step 4: Decide If Sampling Is Worth It
Before making an access point, your inspector should explain what the sample is expected to resolve. The EPA overview of when mold sampling is useful explains that sampling isn’t automatically necessary when visible mold is already present. Testing makes more sense when growth is concealed or when identification will support a specific assessment decision. An existing opening may give you the answer with less damage. Removable trim or an accessible plumbing opening might permit a visual examination with a borescope. If visible growth and water damage already establish what you need to remove, another sample may add little beyond laboratory paperwork.
| Method | Best Use | Main Limitation |
|---|---|---|
| Cavity-air sample | Checking air drawn from one selected wall void | Represents that cavity under the conditions present during collection |
| Tape or swab sample | Identifying suspect material that can be physically reached | Describes the contacted surface, not the entire wall |
| Bulk sample | Examining a small piece of affected building material | Requires material removal and remains location-specific |
| Borescope observation | Viewing concealed damage through a limited opening | Doesn’t provide laboratory identification |
If your inspector can reach suspect growth, a direct surface sample may answer your question more cleanly than cavity-air sampling. The collection method should fit the decision you need to make, not whichever test happens to sound most technical.
Step 5: Prepare and Collect the Sample
Check the Wall Before Making Access
Before your inspector makes an access point, the wall needs to be checked for concealed wiring and water lines. Drilling beside an outlet or directly behind a plumbing fixture is not a sensible homeowner experiment. Your inspector considers the wall assembly and likely service routes before choosing the final location.
Your building’s age and finish history can change which precautions are appropriate when potentially hazardous materials may be disturbed. If the access plan involves an electrical device or questionable material, your inspector may need a different method or another qualified trade.
Protect the Sample Location
To preserve the distinction between your finished surface and the cavity, the area is documented and handled in a way that reduces cross-contamination. Sampling equipment shouldn’t pass through obvious surface growth or dirty material and then be presented as evidence of conditions deeper inside the wall. That would blur the very distinction the sample is supposed to test.
Use the Method the Laboratory Requires
For a cavity-air sample, your inspector uses compatible tubing and collection media to draw air from the selected void. Direct samples contact accessible material, while bulk sampling removes a small fragment. The required collection settings depend on the medium and analytical method, so a universal recipe would be misleading.
Because laboratories set requirements for their media and methods, your inspector needs to follow those instructions during collection. This is one reason you should know which laboratory will receive the sample before anyone begins drilling.
Clear field notes should identify your exact cavity and the type of sample collected. Equipment information and collection settings are recorded when the method requires them. A photograph or location sketch connects the laboratory identifier to a real spot in your building, preventing a result such as “Wall Sample 2” from becoming a useless mystery later.
Step 6: Seal and Submit the Sample
After collection, the access port should be cleaned and sealed with a method suited to your wall finish. Your report should make clear whether that closure is temporary or intended as a finished repair. Patching the sampling hole does nothing to correct your leak, and it certainly doesn’t remediate affected material elsewhere in the cavity.
Every sample label must match the submission paperwork so you can connect the result to the correct location. The chain-of-custody record identifies where and when the sample was collected, then tracks who handled it before laboratory receipt. The requested analysis needs to match the medium collected. Because laboratory credentials aren’t interchangeable, you can review recognized environmental microbiology accreditation through AIHA Laboratory Accreditation Programs and confirm the laboratory’s current status for the requested analysis. In Texas, you should verify applicable provider requirements through the Texas mold assessor and remediator program.
Step 7: Interpret the Result in Context
When your result is positive, it can support the conclusion that fungal material was present at the sampled location. By itself, the result can’t show you the full extent of growth or identify where the water entered. Those questions still depend on your moisture history and the building investigation.
If the laboratory reports a non-detection, you still can’t clear the entire wall. Concealed growth may be patchy, and material on the back of gypsum board may not release detectable particles into the cavity air at the moment of sampling. Your result belongs to one sample collected in one place at one time.
Because there is no universal federal pass-or-fail number for airborne mold, your report needs more context than a single count. OSHA states that federal exposure limits haven’t been established for airborne mold.
You should be skeptical of any report that stamps “safe” on a result without explaining the sampled location or your building conditions. A laboratory number doesn’t replace the judgment required to understand what happened inside the wall.
The strongest interpretation connects your laboratory finding with the observed damage and probable water route. That approach follows the basic logic of ASTM’s guide for fungal growth assessment, which treats sampling as one part of a building investigation. Species names and counts aren’t medical diagnoses, so your health questions belong with a qualified medical professional.
Common Questions About Cavity Sampling
Can Wall-Cavity Sampling Find a Leak?
Depending on the method, your sample can identify fungal material or support evidence of concealed contamination. It can’t locate a leak by itself. Your inspector identifies leaks by interpreting moisture patterns and testing the suspected source against the building’s construction details.
Will One Sample Clear the Whole Wall?
One sample can’t clear your whole wall because it characterizes a selected location under the conditions present during collection. Clearing a larger area may require additional investigation, especially when your wall contains several possible moisture sources or disconnected cavities.
How Much Wall Damage Does Sampling Cause?
The amount of damage you can expect depends on the wall assembly and access method. A small port may be enough for some procedures, while direct material sampling requires removing part of the finish. Before access begins, ask who will seal the opening and whether finish matching is included.
Who Can Perform Mold Sampling in Texas?
Because Texas regulates mold assessment and remediation activities, you should check the provider’s current status through TDLR and ask who will collect your sample. License categories and requirements can change. Request a written explanation of why that specific cavity was selected and how the result will affect your next decision.
References
- NIOSH assessment tool for damp buildings (cdc.gov)
- Mold Testing or Sampling (epa.gov)
- AIHA Laboratory Accreditation Programs, LLC (aihaaccreditedlabs.org)
- Mold Assessors and Remediators Homepage (tdlr.texas.gov)
- Mold – Overview (osha.gov)