
Confession from a mold inspector: the worst mold hotspot is not always the dank crawlspace. Sometimes it is a warm, humid, ear-shaped cave attached to a battery. If you wear hearing aids, you have all the ingredients mold loves. Moisture from sweat and weather. A little earwax buffet. Snug domes, earmolds, and tubes where droplets like to hang out. Even rechargeable chargers can trap humidity. The fix is not bleach or blasting heat. It is simple hearing aid hygiene and smart earmold care that takes minutes and keeps your gear sounding crisp and your ears calm.
Why Mold Loves Hearing Aids
Mold throws a party wherever moisture lingers and air barely moves. Hearing aids offer exactly that. Sweat and humidity soak in during workouts or yard work. Steam from showers and breath under masks adds more. Wax plugs vents or filters and slows evaporation. Inside earmolds, domes, and tubing, you now have warmth, darkness, and food. That same setup can happen in a charging case if damp devices get parked in a plastic box overnight.
Besides wrecking sound, mold and bacteria near the ear canal can irritate skin, cause itching or odor, and set you up for outer ear infections. Any buildup also increases repairs. Cleaning and drying are not vanity steps. They are how you protect your ears and your investment.
Daily Hearing Aid Hygiene
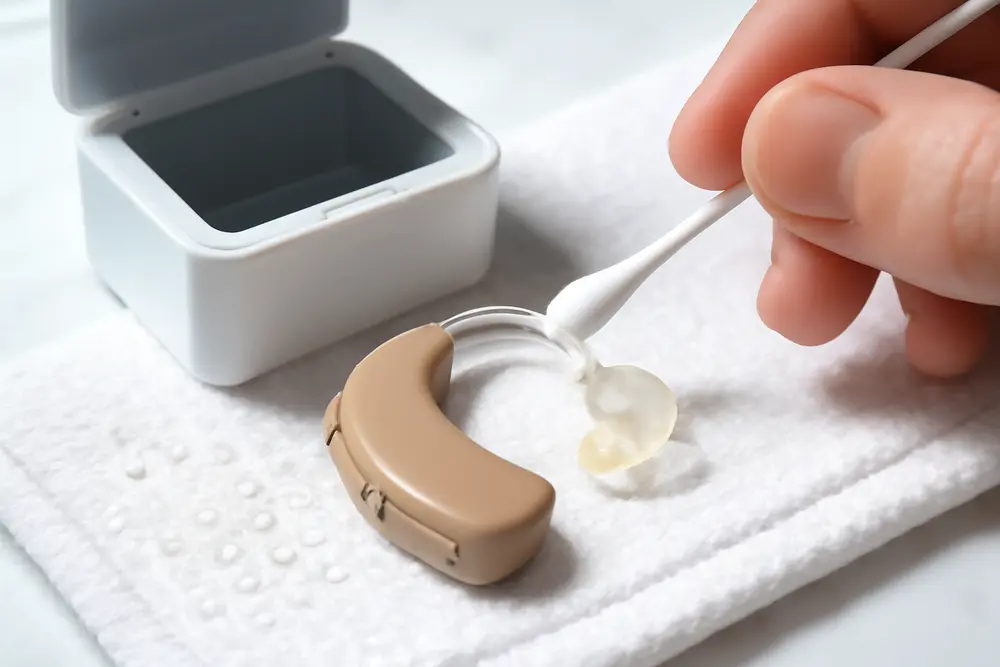
If you can brush your teeth, you can handle daily hearing aid hygiene. Think quick wipe, tiny brush, good airflow, and you are done. Keep a simple kit by your nightstand: microfiber cloth, small hearing aid brush, wax loop or pick, and a dry-aid jar.
| Part | Your Daily Move |
|---|---|
| Earmolds, Domes, Tubes | Detach if your model allows it, then wipe dry. Use a wax loop or pick to clear tips and vents. No soaking and no harsh cleaners. |
| Hearing Aid Body | Wipe with a dry microfiber cloth. Brush microphone openings gently while holding the aid so debris falls out, not in. |
| Battery Doors or Chargers | For batteries, open the door overnight to vent. For rechargeables, confirm the devices are dry before they hit the charger and keep the case clean and dry. |
A few pro tips that keep trouble away. Do not clean over a sink unless you love chasing tiny domes down drains. Never push tools deep into sound ports. Keep liquids far from electronics. That bottle of alcohol under the bathroom sink is not your friend here. Alcohol can harden silicone and damage finishes. If you want wipes, use ones labeled safe for hearing aids, non-alcohol, and lint-free.
Deep Cleaning Steps
Once a week, or anytime you notice buildup sneaking in, give your gear a deeper reset. The exact steps depend on your style of aid.
If you wear behind-the-ear with a custom earmold and tubing, disconnect the earmold and tube from the hearing aid body first. Now you are cleaning plastic and silicone, not electronics. Wash the earmold and tubing in warm water with a drop of mild soap, then rinse thoroughly. No boiling water and no scented hand soap with moisturizers. After rinsing, push out every drop from the tubing with a bulb blower tool. Water that lingers in tubing becomes a little slide for microbes, so the blower matters. Let parts air dry fully before you reconnect them. Fully dry means bone-dry, not mostly-dry and wishful thinking.
For receiver-in-canal aids with soft domes, remove the domes and wash them with mild soap and warm water. Rinse and dry completely. Inspect the wax guard on the receiver tip. If it looks clogged or discolored, swap it for a new one rather than trying to wash it. Wax guards are designed to be replaced, not scrubbed into a second life. Most people replace domes every 1 to 3 months depending on wax and wear. If a dome looks stretched, sticky, or torn, retire it early.
Check vents and filters everywhere you can see them. If you spot cracks, yellowing, or stiff tubing, that is a moisture trap waiting to happen. Replace those parts instead of fighting them every day with picks and prayers. A blocked vent or filter will not just muffle sound. It also keeps humidity parked right next to your ear canal.
Drying That Actually Works
Drying is where hearing aids live or die. You have two safe lanes: air and desiccant. Air drying is slow and steady. Open battery doors if you have them. Put parts on a clean towel. Let evaporation do its thing at room temperature. When you want a faster and safer pull of moisture, use a dry-aid jar or a dedicated dry box with desiccant. Silica gel or commercial dry pellets will quietly yank moisture out of crevices overnight. If your beads are color-changing, follow the product’s instructions to recharge them and keep them working. Keep the jar closed while it is on duty.
Some hearing aid dry boxes add gentle, controlled warmth. If your manufacturer says it is approved for your model, use it as directed. The key word is gentle. The problem is not warmth. The problem is uncontrolled heat.
What not to do is the greatest hits of YouTube bad ideas. No hair dryers. No radiators. No direct sunlight on a car dashboard. Do not microwave anything that goes in your ears. Heat warps earmolds, loosens glue, and cooks microphones. High heat also pairs with humidity to make a sauna, not a dryer. If your aids get soaked by rain or shower, power them off, remove batteries if they are replaceable, pat everything dry, then go straight into a desiccant jar or approved dry box. Resist the urge to speed it up with a hair dryer. Your future self, and your repair bill, will thank you.
Travel And Storage Tips
Hearing aids do not like steamy bathrooms, gloveboxes, or coat pockets with gym socks. Store them in a dry, hard case in a cool spot. Bathrooms are mold boot camps because steam settles into every crack. Do your cleaning in there if you want, but park your devices somewhere else to sleep.
When you travel, stash a mini kit: microfiber cloth, brush, wax loop, spare domes or wax guards, and a small dry-aid jar or a few desiccant packs. If you are flying or visiting a humid climate, up your drying game. Put devices in the jar each night and keep a few extra desiccant packets in your luggage to defend against tropical air. If you are near pools or hot tubs, take the aids out, store them in the case, and enjoy your cannonball without turning the receivers into snorkels.
Rechargeable users, keep the charging case clean, dry, and ventilated. Unplug it before wiping. Brush dust or pocket lint out of the wells with a clean, dry brush. If the case has a cover, let the inside air out while you are not charging so condensation does not build up. Never put damp aids into a sealed charging case and expect magic. That is how you grow a tiny terrarium.
Pets love hearing aids. Toddlers love buttons. Both groups operate on a strict eat-first-ask-later policy. Store your devices high when they are not in your ears.
When To Call A Pro
If you smell a musty odor from your earmold or charger, if your skin is red or itchy, or if you notice drainage from your ear, hit pause and call your audiologist or your doctor. Pain, fever, and persistent wetness are not cleaning problems. They are medical problems. If you clean consistently but you are still battling buildup, ask your audiologist to check fit and venting. A poor seal or a blocked vent traps moisture and can be fixed with a quick parts swap. If sound goes from crisp to muffled after you did all the right steps, the receiver or microphone could be clogged internally. That needs service rather than more scrubbing.
Replacement Timelines
Domes: plan on every 1 to 3 months, sooner if waxy or stretched. They are small, cheap, and hugely influential in hygiene.
Wax guards: change when clogged or discolored, and keep a small pack at home and in your travel kit. Never wash and reuse them.
Tubing for behind-the-ear aids: 6 to 12 months is common, faster if you see yellowing, stiff spots, cracks, or condensation that never seems to clear. Fresh tubing breathes better and dries faster.
Earmolds: clean weekly and inspect for cracks. If odor lingers even after washing and drying, or if skin irritation shows up where the mold touches, ask for a refurbish or a remake. A yearly check is smart, especially for kids or anyone with weight or jaw changes that alter ear canal shape.
Desiccant: swap or recharge your beads when the indicator changes color or the jar seems less effective. Weak desiccant is like a sponge that already had a bath. It does not help.
Quick Troubleshooting
If sound is muffled right after cleaning, do not panic. Check the wax guard and dome seating first. A slightly crooked dome can block the sound outlet. Make sure everything is fully dry before judging performance. Moisture in the receiver port can mute things until it evaporates. That is a perfect job for the dry-aid jar overnight.
If you see foggy condensation inside tubing in the morning, you are either not getting parts fully dry or you are storing in a damp place. Use a bulb blower after washing and add a nightly dry box stop. Move storage out of the bathroom. Try a fresh section of tubing if it keeps happening.
If your charger smells funky, remove the devices, unplug the case, let it air out, and wipe it dry. Clean the wells with a dry brush. Add a small desiccant pack near the case, not inside any electronics vents. Never spray cleaners into the charger.
Earmold Care For Sensitive Skin
If your skin is fussy, pick cleaning products carefully. Stick to mild, fragrance-free soap for parts that are safe to wash. Rinse thoroughly so no residue stays behind. For daily wipes, choose ones specifically labeled for hearing aids and skin-safe, non-alcohol formulas. If redness or flaking persists, even with clean gear, swap domes or earmold material with help from your audiologist. Silicone and acrylic feel different on skin. A tiny material change can be the difference between happy and itchy.
Keeping Moisture Out While You Sweat
Hearing aids do not need to sit out every workout. You just need to block sweat and keep airflow. Headbands, hats, or hearing aid covers made for sports can shield the microphones from drips while letting air circulate. After activity, wipe devices dry, brush openings, and get them into a dry-aid jar for a few hours. If you store them in a case with damp gym clothes, you are basically marinating them. Give your hearing aids their own clean compartment.
What To Skip
Skip hydrogen peroxide, bleach, vinegar, and alcohol on earmolds or domes. Those liquids can irritate skin, degrade silicone, and damage finishes. Skip cotton swabs in sound ports and vents. Lint plus poking equals blockages. Skip third-party heat gadgets that are not designed for hearing aids. Some devices advertise drying with warmth, but uncontrolled heat is a gamble. Use desiccant or a manufacturer-approved dry box instead.
How Hearing Aid Hygiene Helps Your Ears
Clean devices are quieter in all the right ways. Less itch, less odor, and fewer feedback squeals because vents are actually open. Clear sound paths also mean your brain gets a better signal, which can reduce listening fatigue. On the health side, you are keeping the ear canal balanced instead of turning it into a greenhouse. If you are prone to swimmer’s ear or you have diabetes or a weakened immune system, reducing moisture and microbial growth near your ear canal is not just nice to have. It is smart risk control.
FAQ
How do I clean my hearing aids if I have arthritis?
Use larger-handled tools or a cleaning kit with chunky grips. Work over a tray so dropped parts do not vanish. Ask your audiologist to show you how to change domes and guards with low finger strength, or schedule quick clean appointments if needed. It still counts as good hearing aid hygiene if a pro does the tiny swaps for you.
Can I use a UV sanitizer on my hearing aids?
Only if your manufacturer approves a specific model for your devices. Some dry boxes include UV as part of a controlled program. Random UV wands or phone sanitizers are not the same thing and may not be safe for plastics or adhesives in hearing aids. When in doubt, stick to desiccant and approved wipes.
What if I see visible mold on my earmold?
Detach the earmold, wash with warm water and mild soap, rinse, and dry completely. Replace any soft parts like domes that look suspect. If odor or staining does not go away, replace the earmold and have your audiologist check fit and venting. Do not wear visibly moldy parts against your skin.
Should I leave my hearing aids in when I nap?
If you are a light catnapper on the couch, it is usually fine. If you burrow into pillows for hours, remove them so moisture and pressure do not build up. Sleeping all night with them in is not advised unless your clinician told you otherwise.
Is condensation inside tubing normal in winter?
It can happen when you move from cold air to a warm room. Use a bulb blower to clear it and park the parts in a dry-aid jar. If condensation sticks around daily, replace aging tubing and store the aids away from humidity sources.
A Mold Inspector’s Parting Nudge
I hunt mold in attics and basements all week. The pattern is the same in an earmold. Moisture sits still, food shows up, and the freeloaders move in. You do not need a hazmat suit to stop it. A two-minute nightly routine, a once-a-week wash for washable parts, and a small jar of desiccant will beat mold ninety-nine times out of a hundred. Your ears will feel better, your devices will sound better, and I can save the heavy gear for the crawlspace where it belongs.