
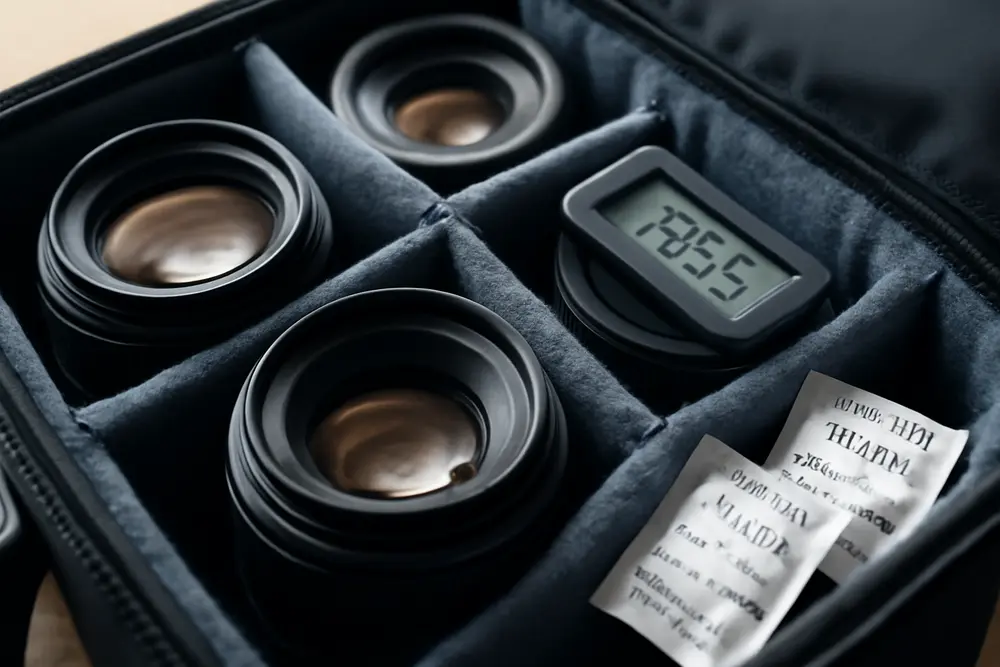
If you’ve ever opened a lens case and found a ghostly spider web inside the glass, that isn’t “vintage character.” That’s fungus, and it eats coatings for breakfast. I run a mold inspection company, so trust me when I say fungi are patient, petty, and perfectly happy to turn your favorite prime into a soft-focus regret. The antidote is not blind hope or baking your gear in the sun like a tray of cookies. It’s smart humidity control, smart storage, and smarter habits after each shoot. Here’s your no-nonsense, slightly sarcastic guide to lens storage humidity, practical post shoot gear drying, and what actually prevents fungus without trashing your optics.
Why Lens Fungus Happens
Fungi aren’t looking for drama. They want three things: moisture, a livable temperature, and food. Camera glass looks clean, but there’s always a little oil from hands, dust, or VOCs from rubber and adhesives. Add humidity and warmth in the 10 to 35 C range and spores can germinate. Once hyphae take hold, they secrete acids that can etch coatings and even the cement between lens elements. That etched look does not clean off later because the damage is in the surface itself. You’ll sometimes spot it as milky haze, patchy spots, or fine branching threads when you aim a flashlight through the elements and rotate the lens. If you see that, don’t wait for it to “work itself out.” It won’t.
For deeper background, see KEH’s storage warning notes on how long-term moisture harms optics and coatings, and the telltale signs shown in guides like DIYPhotography’s fungus overview. The short version: give spores water and they party. Take away the water and the party dies.
What RH Should I Aim For?
There’s a lens storage humidity sweet spot that keeps fungus on starvation rations without mummifying your gear: target 35 to 45 percent relative humidity. That range is dry enough to slow or stop fungal growth while still friendly to lubricants, rubbers, and adhesives found in focus helicoids, zoom cams, and mounts.
Here’s the problem with going rogue. Let humidity rise into the 55 to 60 percent zone and fungal risk climbs fast. On the flip side, park your glass below roughly 30 to 35 percent for long periods and you can accelerate lubricant thickening and rubber hardening. That’s how focus rings get stiff and seals crack. Several dry cabinet manufacturers and pro care guides land in this same mid-30s to mid-40s band because it balances biology with materials science.
Stability matters as much as the number. Big swings are bad. If you bounce gear from an icy car to a tropical sidewalk, internal condensation can fog elements even if you think the day is dry. Aim for steady RH, measured by a small digital hygrometer where the lenses actually live. Trust a number, not vibes.
Dry Cabinet vs Silica Packs
Dry cabinets are the set-it-and-forget-it option. Electronic models actively control interior humidity to your target, often adjustable in single-digit steps. Desiccant-based cabinets absorb moisture passively and may need cartridges swapped or baked out. Either type, when sealed and functioning, can hold 35 to 45 percent RH all week without micromanaging a dozen lens pouches. If you own more than a couple mid-to-high value lenses, a good cabinet pays for itself the day you do not discover webbing behind an aperture.
Silica gel packs, on the other hand, are tactical tools, not a climate strategy. They shine in small, closed spaces like a travel case or backpack. Indicating gels change color as they saturate, so you know when to recharge them in an oven per the manufacturer’s directions. But if your room is sitting at jungle-level humidity, no number of neglected silica packets in random pockets will protect a shelf full of glass. Use them as a supplement or for short-term control while traveling, not as your only line of defense in humid regions.
Whichever route you pick, place a small hygrometer inside the cabinet or case. If you splurged on a cabinet, verify it’s holding target RH after a day or two. Seals fail, filters clog, and power settings get bumped. I toss a couple fresh silica sachets inside my own cabinet as a belt-and-suspenders move. If your hygrometer creeps past 45 to 50 percent, investigate now, not after fungus retires inside your 70-200.
Room Dehumidifiers Or Airtight Tubs?
There are two smart setups if you’re not buying a dry cabinet. First, a dehumidified room with a modest-capacity dehumidifier set for roughly 40 to 45 percent RH, plus a shelf or cabinet that actually seals. This works if your whole space is humid or you store other sensitive gear nearby. Second, airtight containers, like gasketed bins, each with a hygrometer and a few indicating silica packs. Hit the 35 to 45 percent target, crack them open only when needed, and recharge the desiccant whenever the color change says they’re full.
If you live in the South Gulf coast, Florida, or anywhere the weather app reads sauna most of the year, an active dry cabinet or a disciplined dehumidified room is sanity. My day job is preventing condensation and mold in storage containers and buildings, and the same logic applies here: control indoor moisture sources, use sealed storage, and monitor RH. If your room is leaking humid air or you keep cracking the window on rainy days, you’re feeding the problem at its source.
Post-Shoot Gear Drying
This is where most people blow it. You shot surf spray, a misty forest, or a wedding where the AC tried to recreate arctic tundra. You finish, zip everything tight, toss the bag in the trunk, and congratulate yourself on “protecting” the gear. What you really did was trap moisture for a road trip. Post shoot gear drying is where you make or break fungus prevention.
Back indoors, set gear out on a clean, dry surface with good airflow. Take caps off both ends of lenses so you are not sealing humidity inside the barrel. Wipe exterior moisture with a microfiber cloth, paying attention to focus and zoom rings where water likes to hide. Leave bags and cases open so the lining can dry. If you were in high humidity or light rain, crack battery doors and card slots to vent. If your lens got ocean spray, lightly dampen a cloth with distilled water and wipe the exterior to remove salt before drying again.
Moving from cold to warm adds a twist. Seal the camera and lens in a clean plastic bag while still cold, bring it inside, and let it warm up before you open the bag. That way condensation forms on the bag, not inside the lens. Once warmed, open everything, remove caps, and air dry fully before you tuck anything back into a case. The finish line is dry to the touch plus a little extra time for seams and seals to clear the last traces.
Longer storage calls for one more habit: remove batteries and cards. Leaky cells and slow parasitic drain are real, and corrosion is just mold’s grumpy cousin.
Myths That Will Cost You Gear
Myth 1: “Just leave lenses in the sun.” Ultraviolet can damage spores on exposed surfaces, but sunlight doesn’t reach into lens internals, behind aperture blades, or between cemented elements. It also heats the lens unevenly, which can stress adhesives or even shift alignment. If you already have fungal webs, UV doesn’t remove the etch marks they left behind.
Myth 2: “Ozone generators clean fungus.” Ozone can attack rubber, plastics, and adhesives. It is not a precision tool and it does not magically thread its way through tiny internal passages to sterilize your lens without collateral damage. There is no solid optical industry data saying ozone is safe for lens internals. Keep that generator for stinky basements, not precision glass.
Myth 3: “Sealed pouches are always safest.” A sealed pouch with a damp lens is a terrarium. Cases are for transport. Storage is for controlled RH. Fully dry the gear, then store in a cabinet, sealed bin with silica, or a dehumidified room at the right humidity target.
Myth 4: “Hit it with household cleaners.” Vinegar, bleach, undiluted hydrogen peroxide, and multi-surface sprays can strip coatings or haze glass. If a bottle under your kitchen sink promises to melt soap scum, it will not be kind to nano coatings.
Safe DIY Cleaning Steps
If you catch the problem early and it is on an external element, you can do a careful surface cleaning. This does not fix etching or growth inside the optical stack, and it is not a license to unbutton the lens on your dining table. Work slow, test solvents on non-critical surfaces first, and stop if anything looks off.
Step 1: Set up and inspect. Good light, a gentle blower, clean microfiber cloths, and fresh lens tissues are your friends. Avoid canned propellant blasting straight on glass. Use a flashlight at a shallow angle to map the spots or haze before you start.
Step 2: Dry clean first. Use a hand blower to remove loose dust. Lightly brush with a clean lens brush if needed. Rubbing grit across coatings is how you make crescent scratches you will never unsee.
Step 3: Use a lens-safe solution. Apply a drop or two of dedicated lens cleaner or a 70 to 90 percent isopropyl alcohol and distilled water mix to a lens tissue, not directly to the glass. Wipe in gentle arcs from center to edge. Do not let fluid pool at the rim where it can wick inside.
Step 4: Edge detail. If residue clings near the bezel, roll a sliver of lens tissue on a wood stick or use a clean foam swab very lightly moistened. Again, keep fluid minimal.
Step 5: Dry and recheck. Buff with a dry tissue to remove streaks. Inspect again under angled light. If you still see branching threads that do not move, you may be looking at etched damage or internal growth you cannot reach. Stop here and plan for service.
Off-limits: vinegar, bleach, acetone, undiluted peroxide, bathroom sprays, magic potions from internet forums, and anything that smells like it could strip paint. These can remove coatings or fog the glass permanently.
When To Call a Pro
Get professional service if you see fungus between elements, behind the aperture, or inside cemented groups. If the pattern looks like an intricate snowflake, that is almost certainly not on the front surface. Vintage lenses with Canada balsam separations or slung oil near the blades deserve a tech, not a YouTube experiment. Pros use spanner wrenches, collimation rigs, and torque settings to reassemble lenses so your focus scale still means something. Expect that even after a successful cleaning, contrast might not return if coatings were etched. The goal then is to halt further damage and restore what you can.
Do a cost check before you ship anything. If the lens is a budget kit zoom and the quoted service equals half its replacement value, you might retire it and put that money toward a cabinet and better prevention. High-value primes and pro zooms are worth the bench time when caught early.
Routine Checks That Actually Work
Set a schedule. In humid seasons, scan your stored lenses weekly. In drier months, monthly is fine. Hold a small flashlight at an angle through both ends, work the focus and zoom slowly, and look for haze or strands. Keep a log in your phone with hygrometer readings, silica recharge dates, and the rare time you pull a lens for a long rainy-day shoot.
Refresh silica gel whenever the indicator color says saturated or if your hygrometer drifts past the mid-40s. Bake or replace per the pack instructions and let them cool in a sealed jar before returning them so they do not pull in moisture from the room. Wipe shelves and cabinet interiors a few times a year to remove dust and skin oils, which are fungus calorie bars. Exercise aperture rings and focus helicoids periodically to keep lubricants moving without pooling.
If you run a room dehumidifier, clean its filter and empty the reservoir before it overflows and turns your storage corner into a spa. Aim for 40 to 45 percent in the room so your cases and cabinets have an easier job.
Quick Reference
| Goal | Target or Action | Why It Works |
|---|---|---|
| Lens storage humidity | 35 to 45 percent RH | Starves fungus but protects lubricants and seals |
| High humidity threshold | Over 55 to 60 percent RH | Fungal risk rises sharply |
| Low humidity caution | Under 30 to 35 percent RH | Risk of hardened grease and cracked rubber |
| Best storage | Dry cabinet or sealed bin with hygrometer | Controlled, verifiable environment |
| Travel support | Indicating silica gel packs | Short-term moisture buffering in bags and cases |
| After wet shoots | Open caps, wipe down, air dry fully | Prevents trapped moisture inside barrels and cases |
| Cold to warm move | Warm up sealed in a plastic bag | Condensation forms on bag, not inside the lens |
Regional Tips That Save Collections
If you shoot in Florida, the Gulf, or any inland humid basin, think systems, not gadgets. Put your gear shelf in a room that actually closes, run a dehumidifier set near 45 percent, and give air a path to circulate. Inspect door and window seals so you are not dehumidifying the neighborhood. For storage containers or shipping cases, line them with fresh indicating silica and keep a hygrometer inside the case, not across the room. A leak around a window or an AC drip pan problem can push a room above 60 percent RH in a weekend. That is all it takes for spores to turn opportunistic.
I apply the same controls we use for moisture-proofing storage containers: reduce moisture sources, seal the enclosure, and verify performance with actual measurements. Translation for photographers: no wishful thinking, no “feels drier today,” just a number you can read at a glance.
What About UV Lamps Or Ozone Boxes?
Short answer: skip them. UV-C can kill spores on surfaces it can see, but lenses are layered and shadowy by design. You will not sterilize between elements with a desk lamp. Leave a lens in the sun long enough and you also risk adhesive creep and a cooked focusing ring. Ozone boxes add material degradation risks and still cannot guarantee penetration into tight internals. Spend that money on a basic dry cabinet or a good room dehumidifier and a handful of hygrometers instead.
Storage Setup In 10 Minutes
Minute 1 to 2: Put a digital hygrometer where your lenses sit today. Write down the number later today and again tomorrow morning.
Minute 3 to 5: If RH is over 50 percent, move gear into a sealed bin temporarily with two fresh indicating silica packs. Do not overpack. Add a second hygrometer inside the bin if you have one.
Minute 6 to 8: Order either an electronic dry cabinet sized for your kit or a small room dehumidifier if you are storing more than just camera gear. Plan placement away from windows and direct sun.
Minute 9 to 10: Put a calendar reminder to check RH weekly and recharge silica when the beads change color. Treat it like brushing your teeth. Future-you keeps contrast and resale value.
FAQ
What RH should I store lenses at?
Keep lens storage humidity at 35 to 45 percent RH. That band cuts off fungus fuel while keeping lubricants and rubber healthy. Verify with a hygrometer inside the storage space.
Do silica gel packs replace a dry cabinet?
No. Silica packs are great in small sealed spaces and for travel, but they saturate and need recharging. In very humid climates, they cannot hold a whole shelf of gear in range for long. A dry cabinet or a dehumidified room provides active control.
How long should I air dry gear after a damp shoot?
Until everything is dry to the touch plus at least another hour with caps off and bag open. If you moved from cold to warm, let gear warm sealed in a plastic bag first, then dry openly.
Can I fix etched coatings?
No. You can remove living fungus, but the micro-etching it leaves is permanent. Professional cleaning may improve contrast if haze is the main problem, but etched spots are scars.
Is sunlight a safe disinfectant for lenses?
It is unreliable and risky. Sunlight does not reach internal surfaces and can overheat adhesives. Use controlled humidity to prevent growth in the first place.
What cleaning fluid is safe?
Dedicated lens cleaner or a light mix of isopropyl alcohol and distilled water applied to a tissue. Never use vinegar, bleach, acetone, or undiluted peroxide.
Sources And Further Reading
If you want to go deeper, cabinet makers and pro care guides align on the same core targets. For an overview of dry cabinet ranges and risks of over-drying, see manufacturer FAQs such as SMT Dry Boxes. For fungus ID and prevention habits, DIYPhotography’s prevention guide and KEH’s notes on storage harm are helpful. For why UV and quick fixes fall short, pro-care resources like AWPro’s lens fungus primer explain limits clearly. If you store gear in containers or sheds, apply the same moisture control principles we use in buildings and storage units by targeting around 45 percent RH and eliminating infiltration paths.