If your swamp cooler smells like a locker room that tried to start a sourdough starter, you don’t need sage or crystals. You need evaporative cooler hygiene. The whole point of an evap is fresh, outdoor air cooled by clean water and clean pads. When hygiene slips, pads sludge up, minerals cake, humidity climbs, and your home becomes a mold Airbnb. This guide breaks down pad care, water quality and bleed-off valve adjustment, airflow and venting, seasonal shutdown, and the red flags that say microbes are throwing a house party in your cooler.
What Is Evaporative Cooler Hygiene?
Evaporative cooler hygiene is the routine that keeps the water and surfaces inside your cooler clean, moving, and unable to host mold or bacteria. It’s a handful of habits working together: pads that are rinsed or replaced before they get swampy, a sump that isn’t a mineral hot tub, bleed-off that actually bleeds minerals out, steady airflow with proper venting, and a seasonal shutdown that dries everything. Do those things and you’ll have crisp, cool air instead of a damp perfume of “lake in August.”
Quick reality check: evaporative coolers add moisture to air by design. If that moisture gets trapped, or the recirculating water turns into mineral soup, mold risk rises. Keep indoor humidity in the 30 to 50 percent range whenever possible and avoid letting it hang above 60 percent for long, which multiple IAQ sources flag as a mold trigger. For perspective on household humidity and mold growth dynamics, see our guide on humidity control and cleaning rhythms that prevent mold in moisture devices like humidifiers on our site here.
Pad Care That Actually Works
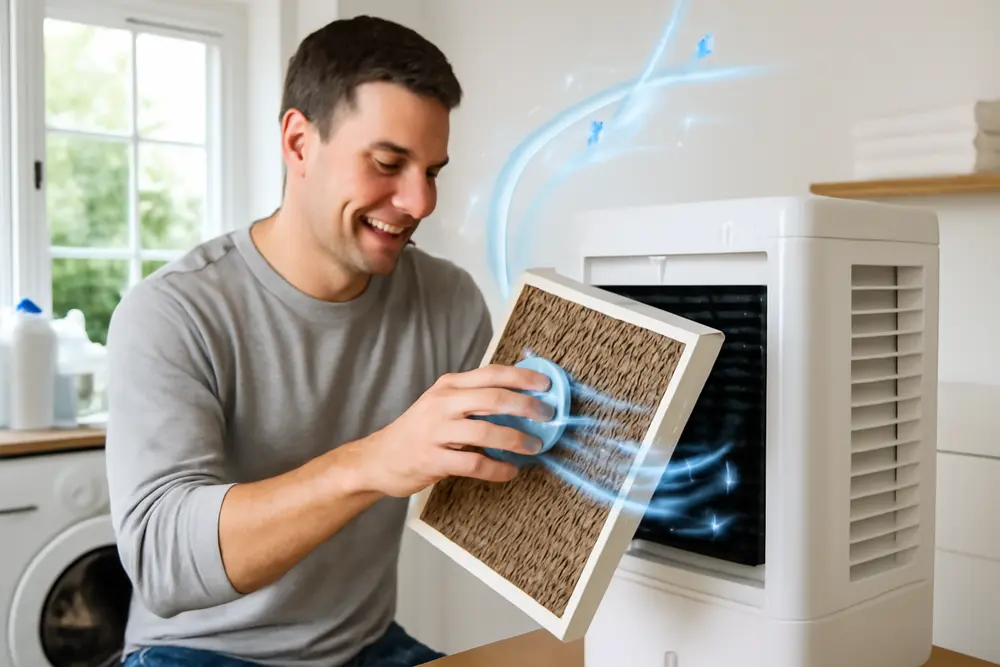
Your cooler’s pads are where the magic happens. They’re also where dust, pollen, and minerals collect. When pads clog, water stops wicking evenly, air restricts, efficiency drops, and the wet, uneven surface becomes a microbial buffet. That earthy funk isn’t “just how coolers smell.” It’s a warning.
There are two common pad styles: aspen wood excelsior pads and rigid cellulose or synthetic honeycomb media. Aspen pads are cheaper and usually replaced more often. Rigid pads cost more and last longer if you keep minerals under control.
Use this no-drama approach to pads:
1. Inspect every month during the cooling season. Look for slime, dark or white crusty scale, or any pad sections that are staying dry while others are soaked.
2. Rinse light dust and debris. Remove pads and hose from the clean side out to push debris back toward the airflow side. Let them drain fully before re-installing.
3. Replace when they won’t rinse clean or when they smell musty soon after running. Aspen pads often need replacement midseason in dusty areas or by season’s end in cleaner areas. Rigid pads can last 2 to 5 seasons with proper bleed-off and cleaning, but replace them if they stay musty, are physically degrading, or have deep mineral channels that won’t clear.
4. Avoid harsh chemicals. Many pad materials hate bleach. If disinfection is needed, remove the pads and sanitize metal or plastic surfaces separately with a manufacturer-approved cleaner or 3 percent hydrogen peroxide. Always check your cooler’s manual first.
Pad Material, Care, And Replacement
| Pad Type | Typical Care | Replace When |
|---|---|---|
| Aspen Wood Excelsior | Monthly inspection; rinse debris; expect more frequent changes in dusty regions. | Seasonal or midseason if musty, slimy, or scaled; any dry-spot channeling. |
| Rigid Cellulose/Synthetic | Monthly inspection; gentle rinse; manage minerals with proper bleed-off. | Every 2 to 5 seasons or sooner if odor persists, pads degrade, or water tracks unevenly. |
Water Quality And Bleed-Off Basics
Evaporative coolers recirculate water. As water evaporates, the minerals stay behind and concentrate in the sump. High mineral content makes pads crusty and reduces wicking. Worse, uneven wetting creates damp-dry contrasts that microbes adore. That’s why coolers use a bleed-off system: it continuously dumps a small amount of mineral-rich water so fresh water can dilute what’s left. When the bleed-off is set right, your pads stay wet but not crusted, your sump doesn’t become a geology lesson, and mold has a harder time putting down roots.
If you have hard water, you’re going to lean on bleed-off more. In extremely hard water zones, consider a simple inline filter or softening strategy designed for evaporative equipment. Some local utilities publish evap maintenance tips and water-specific recommendations, like Mission Springs Water District. Manufacturers also give water flow and bleed-off guidance for different models, such as Seeley/Braemar’s technical notes on pad wetting and bleed rates here.
Optimizing Bleed-Off Valve Adjustment
Bleed-off valve adjustment is not a set-it-and-forget-it forever thing. It’s a seasonal ritual. The goal is to limit mineral concentration without wasting water. There are two practical ways to set it, and you can combine them for a foolproof approach:
Method 1: Visual and tactile tuning. Start with a conservative, modest bleed-off. Run the cooler for several days. Inspect pads and the sump. If you see rapid white crust forming, or you feel rough, chalky deposits, increase bleed-off a notch. If the sump looks clean and pads look healthy after a couple of weeks, you’re close. If the bleed-off stream seems wasteful and the pads stay clean, dial it back slightly and re-check after a week.
Method 2: Cheap meter sanity check. Grab an inexpensive TDS meter. Test your tap water TDS and compare it to sump water after the cooler has run for at least an hour. As a homeowner rule of thumb, keep the sump’s TDS roughly under two to three times the tap water. If it climbs beyond that and pads are scaling, open the bleed a bit. If it stays close to tap TDS and you’re dumping a ton of water, close the bleed a bit. Recheck monthly since outdoor dust loads and weather shift water quality needs.
Whichever method you use, confirm that water evenly wets the entire pad surface without flooding. Over-watering doesn’t cool better. It just pushes minerals faster and can aerosolize musty odors. Many manufacturer guides recommend setting water flow so pads are fully wet but not dripping heavily from the bottom edge.
If your cooler has no bleed-off, consider a retrofit kit or plan more frequent manual drain-and-refill cycles. Without some form of mineral control, you’ll fight constant scale and an elevated mold risk, as contractor manuals and consumer guidance consistently warn.
Airflow And Venting That Prevent Mold
Evaporative cooling works by moving lots of outdoor air through wet pads and exhausting that air out of the home. If you trap the moisture inside, indoor relative humidity surges and surfaces get clammy. That’s when condensation forms on windows and walls, and that’s when mold really wakes up. Multiple homeowner and HVAC sources recommend cross-ventilation whenever you’re running a swamp cooler. A common rule is to provide a relief opening sized to the cooler’s airflow so you are not pressurizing the building with wet air.
Practical setup that actually works:
• Make sure at least one window or vent is open in the far rooms you want to cool. You want air to move from the cooler to those rooms and then out. Start with a 1 to 2 inch crack in a few windows and adjust. If rooms feel stuffy or you see condensation, open them a bit more.
• Focus on air path. You want a clear route from the cooler’s supply register through living areas to open windows. Closed doors equal trapped moisture.
• Track indoor humidity. If you see readings above 60 percent for extended periods, you need more venting, less run time, or fan-only operation to dry pads and the house a bit. Guidance on target humidity for mold control is covered in our humidity articles, like this quick primer on ideal indoor RH.
• On unusually humid days, use fan-only mode or run the cooler in short bursts. Evaporative cooling is stellar in arid climates and less stellar when a monsoon rolls in.
Seasonal Shutdown And Storage
The end of cooling season is your chance to hit reset. Anything left wet and dark over winter invites biofilm and corrosion. A clean shutdown pays dividends in spring.
Here’s the routine that doesn’t cut corners:
1. Run fan-only for 20 to 30 minutes with the water supply off to dry the pads. This reduces mold risk during downtime, a tip echoed by multiple HVAC guides.
2. Shut off water and power. Drain the sump completely. Remove and inspect pads. If they’re questionable now, they’ll be worse in spring. Replace as needed.
3. Clean the sump and cabinet. Scoop out sludge, scrub mineral scale carefully, and rinse. Use a mild detergent followed by a light 3 percent hydrogen peroxide rinse on metal and plastic surfaces. Avoid harsh chemicals on pads or parts the air passes directly through unless the manufacturer allows it.
4. Check the pump, distribution lines, and float valve. Clear clogged distribution holes so next year’s water spreads evenly instead of carving channels. Replace brittle lines and worn pump screens.
5. Cover the unit with a breathable cover and block the duct/register inside so winter air does not whistle through your cooler into the house. Breathable covers reduce condensation inside the cabinet.
Spring startup is simple when you shut down clean. Reinstall fresh or dry pads, check the float and pump, verify even water distribution, and re-tune the bleed-off valve for the season. Let the cooler run in fan-only for 10 minutes after reassembly to confirm airflow and to shake out any dust before you add water.
Red Flags You Should Not Ignore
• Musty, earthy, or dirty-sock odor when the cooler starts. A brief wet-cardboard whiff at startup can be normal with new pads, but any persistent odor says clean or replace.
• Visible mold on pads, cabinet walls, or supply duct. Colors vary from black to green to ghostly white. Growth is growth.
• Allergy or respiratory irritation that improves when the cooler is off. Not a diagnosis, but a strong clue something microbial is hitching a ride on the airstream.
• Condensation on windows or walls while the cooler runs. That means venting is inadequate for the airflow you’re pushing. Open relief paths or reduce run time.
• Mineral stalactites, furry scale, or chalky pads. This points to low bleed-off or poor water quality control. Expect poor cooling and higher mold risk.
• Overflow or a constantly running bleed stream. That screams misadjusted float or an over-aggressive bleed setting.
Troubleshooting The Usual Suspects
Bad smell right after cleaning: Run fan-only for 20 to 30 minutes to dry the pads and cabinet surfaces. If the smell returns fast, the pads are likely toast or the sump wasn’t fully cleaned. Check the ductwork for hidden growth if odor persists after pad replacement.
Mineral crust returning quickly: Open the bleed-off valve a notch and verify even water distribution. Check your water source TDS. In very hard water areas, you might need more bleed or more frequent sump drains. Some manufacturers recommend a periodic full drain-and-refill during heavy use.
Pads look wet on top but dry in the middle: Your distribution header holes are clogged, or your pump is weak. Clean the header and replace the pump if the flow is anemic. Uneven wetting equals poor cooling and inconsistent hygiene.
Water splashing or flooding the cabinet: Water flow is too high or the float is set too high. Reduce the flow until pads are fully wet but not dripping excessively. Verify the float shuts off at the right level to avoid submerging the pump and pads.
House feels muggy with cooler running: You have poor exhaust. Open windows further in the rooms farthest from the cooler, create a better path for air to exit, and consider fan-only or reduced duty cycling on humid days. Sources that study evap performance consistently tie mold risk to letting indoor humidity hang above 50 to 60 percent, such as the guidance summarized by indoor air sites like this overview.
Water usage seems excessive: You might have an overzealous bleed-off valve or a leaking float. Dial the bleed down slowly while watching for scale over the next week. Fix any leaks before they rinse your wallet.
When You Need A Pro
There is DIY, and then there is rolling into mid-July with a swamp that smells like an old gym bag. If pad replacement, sump cleaning, and bleed-off tuning do not stop the odor, it is time for a deeper look. Mold inside the duct, cabinet insulation, or supply plenum is best handled by a professional who knows how to contain and remove growth without distributing spores through the house.
Call in a mold inspection and testing specialist when:
• Odor persists after new pads, full cleaning, and proper drying.
• You see heavy, spread-out growth inside the cabinet, on the supply duct, or around registers.
• Family members have ongoing irritation that correlates with cooler use.
• There is visible water damage or staining around the cooler curb or roof penetration.
A professional inspection scopes the cabinet, ducts, and surrounding materials, checks humidity and moisture patterns, and, if needed, performs targeted sampling to confirm what type of growth you’re dealing with. If remediation is required, do it before the next heat wave so you are not choosing between hot and musty.
A Simple Hygiene Routine
If you like simple, here’s the routine that keeps swamp coolers fresh without turning you into a full-time pad whisperer:
At startup: Install fresh or clean pads, verify even water distribution, set a modest bleed-off, and run fan-only for a few minutes to confirm airflow. Note your humidity baseline indoors.
Monthly in season: Inspect pads, rinse debris, check for odor, wipe the sump, clear distribution holes, and recheck bleed-off by sight and, if you have a TDS meter, by the numbers. Adjust venting so rooms stay comfortable without condensation.
After dusty events: Rinse pads and drain the sump. Dust plus water equals sludge. Don’t give it time to organize.
After humid spells: Use fan-only to dry pads and the house a little. If humidity stays high indoors, open windows wider or reduce run time.
Shutdown: Fan-only dry, drain completely, clean cabinet, remove or replace pads, check pump and float, cover with a breathable cover, and block the duct inside the house.
FAQ: Evaporative Cooler Hygiene
Do swamp coolers cause mold?
Only if you let them. Mold needs moisture, a food source, and time. Evaporative coolers provide moisture, so your job is to manage water quality, keep surfaces clean, and move air out of the house instead of trapping it. With regular pad care, tuned bleed-off, and proper venting, mold risk stays low. Guides from HVAC pros and consumer resources, like HVAC Boss and Hunker, emphasize the same basics.
How often should I replace pads?
Aspen pads often get replaced each season in clean areas and midseason in dusty regions. Rigid pads can last multiple seasons if you control minerals and keep them clean. Replace any pad that smells, is slimy, is deeply scaled, or won’t wet evenly after cleaning.
What’s a reasonable bleed-off setting?
Enough to prevent rapid scale but not so much that you’re irrigating the neighborhood. Start modest, watch pads and the sump for a week, and tweak. If you like numbers, aim for the sump TDS to stay under roughly two to three times your tap water TDS.
Can I disinfect pads with bleach?
Usually not recommended for cellulose-based pads. Bleach can degrade pad material and create irritating fumes. Remove pads and sanitize the cabinet with a manufacturer-approved cleaner or a mild peroxide solution. Always check your manual.
Why does my house feel muggy with the cooler on?
Your exhaust strategy is weak. Open windows or vents further, especially in the spaces farthest from the cooler, and ensure doors are open to let air pass through. On humid days, use fan-only or shorten run cycles.
Is a bleed-off line worth it if water is expensive?
If you have hard water, yes. Bleed-off protects pads, keeps cooling performance high, and reduces mold risk. Without it, you pay later in pads, cleanings, and possibly indoor air issues. If you can’t run a continuous bleed, schedule periodic sump drains and refills to reset mineral levels.
Proof That Clean Coolers Cool Better
Manufacturers and utility districts have been saying the quiet part out loud for years: clean pads wick better, scale kills efficiency, and correct bleed-off protects everything. See manufacturer tech notes on water flow and bleed settings from Seeley International, and local water district advice on maintenance and winterizing, like MSWD’s guide. Consumer and HVAC sources also echo the fundamentals: keep indoor humidity under control with real ventilation, use fan-only to dry pads at shutdown, and reset minerals before they crust your cooler.
If your evap is tuned and the air feels clean and crisp, you’ll notice it: cooler rooms for the same runtime, windows that don’t fog, and a cooler that doesn’t smell like it’s brewing compost tea. That’s evaporative cooler hygiene doing what it’s supposed to do.