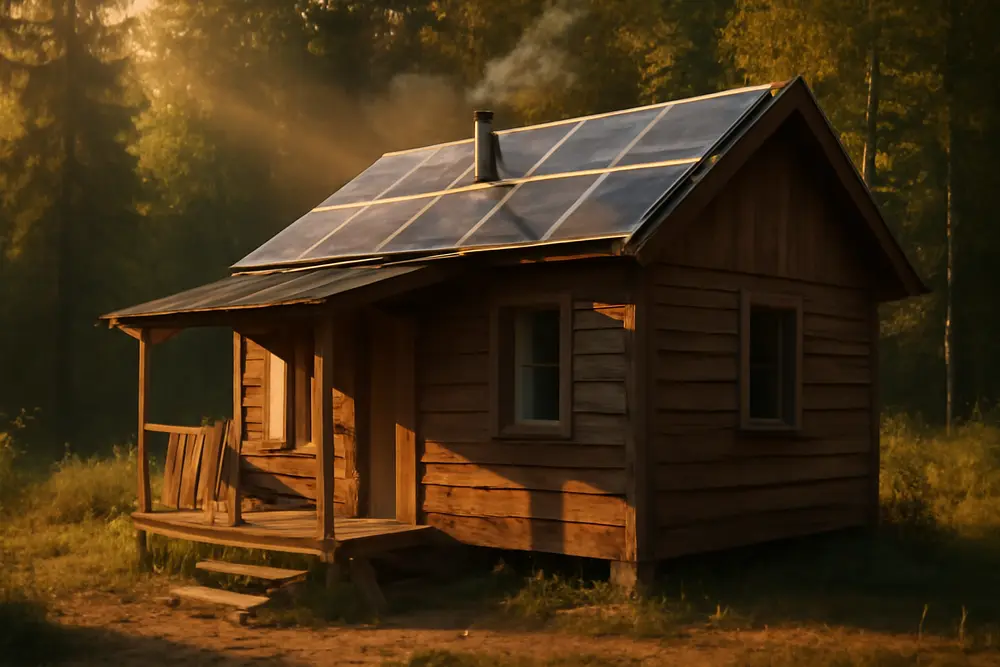
If you think your off-grid cabin is a sanctuary, mold thinks it’s an all-inclusive spa with bottomless humidity and zero checkout policy. I own a mold inspection company, and trust me, mold is an opportunist with a PhD in “thrives when you’re not looking.” The good news: you can keep that cabin dry without plugging into the grid by mixing solar-driven ventilation, low-watt DC tech, smart building details, and seasonal tactics that actually work. We’re talking practical off-grid cabin humidity control, not wishful thinking or vapor-barrier folklore. Target that 30-50 percent relative humidity sweet spot, manage dew point, and your cabin stops being a terrarium and starts being a home.
What Causes Humidity In Off-Grid Cabins?
Moisture is sneaky. You exhale it, you cook it, you bathe in it, and then your cabin soaks it up like a sponge. In small, tight spaces, a single simmering pot can push RH over 60 percent faster than you can say “black spot on ceiling.” If you drag in wet gear or live with a drying rack indoors, you’re basically running a mist machine.
Then there’s the building envelope. Thermal bridges create cold interior surfaces that meet warm moist air, and boom, hello condensation. Poor insulation, leaky windows, or missing vapor barriers let moisture park inside walls. Howard Environmental’s guide on mold-resistant homes breaks it down with rain screen strategies, vapor-permeable barriers, and smarter detailing so walls can dry in the right direction without marinating framing in moisture. See their design notes here: Mold-Resistant Homes: Innovations in Design and Materials.
Materials matter too. Paper-faced drywall and raw wood in splash or steam zones pretty much roll out the welcome mat for fungi. Instead, use mold-resistant drywall or MgO boards, closed-cell insulation where appropriate, and keep truly organic stuff out of chronically damp areas. Howard Environmental’s materials list is worth a bookmark: Mold-Resistant Materials for Healthier Buildings.
Mold-Proof Envelope Tips
Let’s get your bones right before we start slapping fans on the roof. A mold-proof-leaning envelope is about drainage, drying, and thermal control.
Use a rain screen wall so bulk water sheds outward and the cavity ventilates. Pair it with a smart, vapor-permeable weather-resistive barrier so assemblies can dry. Go for generous overhangs and deep eaves to keep walls and openings shaded and drip-free. These are straight out of Howard Environmental’s mold-resistant design playbook: Mold-Resistant Homes.
Insulation choices are not just about R-value. Closed-cell spray foam on roof decks or rim joists can stop air leaks and reduce condensation risk. In walls, consider a continuous exterior insulation layer to kill thermal bridges that create cold spots. Where you keep wood, use treated or engineered products that do not feed mold easily. More material ideas here: Mold-Resistant Materials.
Leak prevention is non-negotiable. Flash the roof properly, especially at valleys and penetrations. Seal window-to-wall transitions with flexible flashing tapes and back dams. Keep foundation drainage honest with proper grading, drains, and capillary breaks. If the shell stays dry, you need fewer watts and fewer prayers.
Passive Vs Solar Venting
Fresh air is the cheapest dehumidifier you will ever own if the outside air is drier than inside. Passive venting uses temperature and wind to pull air through the cabin. With ridge vents and soffit intakes, warm moist air exits high while cooler dry air sneaks in low. Cross-ventilation through operable windows and louvered vents can move a lot of air on breezy days. The upside is zero power use and zero maintenance. The downside shows up on still, humid days when your passive system is as motivated as a teenager at 6 a.m.
Enter solar-driven ventilation. Low-watt DC fans run happily off small solar arrays or directly off a panel through a controller. Typical off-grid DC fans draw about 10-35 watts depending on size and speed, which lines up with data in off-grid appliance surveys and DC fan spec sheets. See examples and ranges in off-grid market snapshots and DC fan vendors here: Off-Grid Appliance Market and DC Fan Ranges. The beauty is you can run a 20-watt fan for hours without flattening a battery bank, especially if you time it with sun hours.
Solar attic fans and roof vents can do the heavy lifting for tiny cabins. For cabins under 500 square feet, target roughly 500-700 CFM of exhaust capacity. Bigger cabins often need 800-1,200+ CFM or multiple fans to get meaningful air changes. Many solar attic fan kits come with 25-40 watt panels, and you will see ratings claiming 1,500-2,600 CFM. Treat the CFM labels as marketing starting points and pick gear with verified performance and decent static pressure handling. A general market overview is here: Solar Roof Vents.
One more option, especially in cold climates, is a compact HRV or ERV. As Howard Environmental points out in their small-space guide, “keep relative humidity in the 30-50 percent sweet spot,” and “many compact units sip power under 10 watts on low.” That is a big deal for winter ventilating without hemorrhaging heat. Source: Fog-Free Tiny Homes & Vans.
Sizing Dehumidifiers And Solar
Ventilation is your first line, but in shoulder seasons or swampy weather, you will want a dehumidifier. There are three categories worth considering:
Compressor dehumidifiers are the common plug-ins. They are efficient at room temperature, pulling a lot of water per watt, but they hate the cold and can ice up below roughly 60-65 degrees Fahrenheit. Power draw is typically 250-700 watts while running, and daily run time depends on RH and cabin size. See usage ranges that off-grid folks track here: Appliance Wattage Examples.
Desiccant dehumidifiers work better in cool conditions, and they can keep drawing moisture when compressors give up. They often use similar or slightly higher wattage per pint removed, but they are clutch in shoulder seasons or unheated cabins.
Chemical or gel canisters are low-tech backups. They help in closets or during long absences, but they are no match for a wet cabin and need frequent replacement.
Now let’s talk solar math using a simple daily energy budget. Add up your continuous loads and your task loads, then size panels and batteries to cover them with a seasonal safety factor.
Example 1: 480 square foot cabin in a mild climate using solar-driven ventilation plus a small compressor dehumidifier in summer.
Loads:
- DC ventilation fan, 25 watts average for 10 hours on sunny afternoons = 250 Wh
- Solar roof vent, 30 watts for 6 hours when the sun is bright = 180 Wh
- Dehumidifier, 350 watts for 3 hours when RH spikes = 1,050 Wh
Daily total: 1,480 Wh. If you have 4 peak sun hours on average, panel wattage is 1,480 Wh ÷ 4 = 370 watts. Add 25 percent for system losses and cloudy variance and you are near a 500-watt array. For batteries, aim for 1-2 days of autonomy. At 1,480 Wh per day, 2 days is 2,960 Wh. On a 24-volt bank, that is about 123 Ah. On 12 volts, it’s about 247 Ah. If you want less stress and more rainy-day margin, double it.
Example 2: 800 square foot cold-climate cabin with a compact HRV on low and a desiccant dehumidifier used occasionally.
- HRV at 8 watts for 24 hours = 192 Wh
- Two DC fans at windows, 15 watts each for 8 hours = 240 Wh
- Desiccant dehumidifier at 300 watts for 2 hours during wet spells = 600 Wh
Daily total: 1,032 Wh. With 3 winter peak sun hours, you need 344 watts of panel. Add 30 percent winter derate and snow reality, and you are in the 450-500 watt range minimum. Battery for 2 days at 24 volts: 86 Ah. At 12 volts: 172 Ah. Again, margin is your friend when you are off-grid.
The process is the same regardless of cabin size. List watts, multiply by hours, add them up. Then divide by realistic peak sun hours for your season and latitude. A plain-English solar sizing walkthrough is here: How Big of a Solar System Do You Need for a Cabin?.
Seasonal Moisture Strategy
Humidity control is seasonal, because physics likes to keep you on your toes. In summer, outside air can be hot and heavy, so you will rely on targeted ventilation during the driest part of the day, plus dehumidification as needed. Use purge ventilation when the sun is out and panels are pumping. Howard Environmental’s small-space playbook suggests a simple rule of thumb: on sunny days with surplus solar, run ventilation harder for about an hour to purge moisture stored in materials. That habit keeps wall cavities and furnishings from slowly loading up. Source: Fog-Free Tiny Homes & Vans.
In winter, the enemy is condensation on cold surfaces. Keep interior surfaces warmer with better insulation and fewer thermal bridges, and ventilate enough to keep RH below 50 percent indoors. If your cabin is 68 degrees Fahrenheit inside and the interior surface of a window is at 45 degrees, any air with a dew point above 45 will condense on it. Translated: boil pasta with the window closed and you just turned the sash into a rain cloud. That is where an HRV on low plus spot exhaust near cooking and bathing can keep RH in check for only a handful of watts.
After rain or snow melt, run fans longer while the air is dry, even if it is cool, and crack interior doors and cabinets. Wet boots and gear should dry in a semi-outdoor mud room or with a dedicated exhaust fan. If the cabin has been unused for weeks, open up on a sunny, breezy day, ventilate hard for a few hours, then let the low-watt fan keep a gentle trickle going.
Monitoring And Control
If you are not measuring, you are guessing. A few digital hygrometers placed around the cabin will show you where humidity hides. Track RH and temperature, and pay attention to dew point. Above 60 percent RH for long stretches, mold can get busy in a matter of days. Howard Environmental hammers the target range often: aim for 30-50 percent RH and keep it there.
Set a humidistat to kick on your fan or dehumidifier at 50-55 percent so it handles spikes automatically. If you are building new, wire a small control panel that prioritizes loads when solar production is high and sheds them when it is not. No WiFi needed. Just a humidity switch, a timer, and a sanity check once a week.
Maintenance is the unsung hero. Clean fan grilles and filters every few months. Inspect soffit and ridge vents for bird nests and spider kingdoms. Check window seals and door sweeps yearly. When the sun is out, open cabinet doors and lift mattresses on platform beds for an hour so stagnant air does not sit where wood meets wood.
Materials And Gear Checklist
Build it to dry fast and drain faster. Then ventilate with low power.
- Exterior: rain screen cladding, vapor-permeable WRB, generous overhangs, metal flashing at all penetrations
- Insulation: closed-cell foam at rim joists or roof deck, continuous exterior insulation to cut thermal bridges
- Interior: mold-resistant drywall or MgO boards in kitchens and baths, sealed or non-absorbent flooring, avoid raw paper-faced products in splash zones
- Ventilation: low-watt DC fans rated 10-35 watts, weather-rated louvered vents, solar attic fan sized for your square footage
- Controls: digital hygrometers, humidistat or smart relay, simple timer for purge cycles
- Drainage: foundation drains, sloped grade, capillary breaks under sill plates
Material references and specs from Howard Environmental: Mold-Resistant Materials and Mold-Resistant Homes. Fan wattage references and market benchmarks: Off-Grid Appliance Market, DC Fans, and Solar Roof Vents.
Case Studies From The Field
New build, coastal ridge, 520 square feet. The owner used a rain screen, vapor-permeable WRB, and 1.5 inches of exterior mineral wool to reduce thermal bridging. Inside, mold-resistant drywall went in the galley and bath. Ventilation is a 30-watt solar roof vent plus a 20-watt DC fan with a 55 percent RH trigger. Summer afternoons they get a steady 600-800 CFM on sunny days, and in sticky mornings the dehumidifier runs for about 2 hours. Average indoor RH sits 40-48 percent with windows closed, even after cooking. The only time they saw condensation was when they dried wetsuits inside. Now the suits hang under the eave with a dedicated exhaust nearby. Problem solved and no more salty indoor rainforest.
Retrofit, mountain valley, 760 square feet with a gloomy crawlspace. We found thermal bridges at rim joists, a sad bath fan that vented into the attic, and zero soffit intake. The fix list was not sexy but it worked. Closed-cell foam at the rim, new soffit and ridge vents, a 25-watt DC fan on a humidistat, and a 300-watt desiccant dehumidifier used during wet thaws. The attic stopped sweating, the crawlspace RH fell from 75 percent to under 55 percent, and the window sills quit growing those charming black freckles. Power comes from a 600-watt array that also charges lights and a laptop. They track RH with three $15 sensors and a notebook. Low drama, which is the goal.
Cost And Energy Trade-Offs
Let’s talk numbers before mold talks to your bank account. A 30-watt fan running all day is 720 Wh. In many cabins that is less energy than a single hour of a mid-size dehumidifier. Running that fan every day for a month is roughly 21.6 kWh. With a modest panel array and a decent charge controller, that is a rounding error compared to the cost of replacing trim, drywall, and insulation after a hidden mold party. Solar attic fan kits typically land in the low hundreds, while a decent compressor dehumidifier is similar. One attic fan plus one DC fan is a low-cost humidity insurance plan.
Where off-grid changes the equation is autonomy. If your cabin sits empty for stretches, passive and solar-driven ventilation are your only bouncers on duty. A small battery to run a 10-35 watt fan at low speed at night can prevent that dreaded stale-cabin smell by keeping RH under the 60 percent danger line. If you are crunching cost, do this order of operations: fix the envelope so water stays out, size solar ventilation appropriately, then pick a dehumidifier to handle peak loads. Your panel cost goes down when your walls stop acting like wet sponges.
Action Plan You Can Start Now
Start with a baseline. Place hygrometers in the living area, bath, sleeping loft, and near the floor by an exterior corner. Track a week of RH and temperature. If you see daily peaks over 60 percent, plan on ventilation upgrades. If you see condensation on windows or cold surfaces, you have a thermal bridge or air leakage to fix.
Next, set up the airflow. If you have a ridge, get it venting and make sure soffit intakes are clear. Add a louvered intake low on the cool side of the cabin and a solar-driven exhaust high on the warm side. Use a low-watt DC fan on a humidistat to run when RH creeps over 50-55 percent. Put a timer in the mix so you can run a daily purge cycle during sunny hours.
Then, decide on dehumidification. For warm-season cabins, a small compressor unit on a smart plug or humidistat is efficient. For cold-season cabins, pick a desiccant model that still works under 60 degrees Fahrenheit. If your cabin is under 500 square feet and decently sealed, plan on 2-4 hours of runtime during wet stretches. Larger or leakier spaces need more runtime or a bigger unit.
Finally, harden the envelope over time. Add exterior insulation or targeted foam at rim joists, swap paper-faced drywall for mold-resistant boards in steamy zones, and fix any window or roof flashing that looks tired. Small changes to thermal bridges and leaks often shave 10-15 percent off your indoor RH peaks, which in turn lets you buy smaller fans and fewer panels.
Quick Reference Table: Example Loads And Solar
| Cabin Setup | Daily Loads | Daily Wh | Min Panel W (4 PSH) | Battery At 24 V For 2 Days |
|---|---|---|---|---|
| Small cabin, DC fan + dehu | 25 W fan 10 h, 350 W dehu 3 h | 1,300 Wh | 325 W + margin = 450-500 W | ~108 Ah |
| Mid cabin, two DC fans | 2 x 20 W 8 h, solar vent 30 W 6 h | 460 Wh | 115 W + margin = 200-250 W | ~38 Ah |
| Cold climate, HRV + spot fan | HRV 8 W 24 h, 15 W fan 6 h | 288 Wh | 72 W + margin = 150-200 W | ~24 Ah |
Numbers are examples. Always measure your actual watt draw and hours, then add 20-30 percent for losses and clouds.
FAQ: Off-Grid Humidity And Mold
What RH should I target in an off-grid cabin?
Keep RH between 30 and 50 percent. Above 60 percent for extended periods is mold’s green light. Howard Environmental’s guidance is consistent on that target.
Can I skip a dehumidifier if I have good ventilation?
Sometimes. In dry climates, solar-driven ventilation may be enough. In humid climates or during long rainy spells, you will likely need a dehumidifier to keep RH under control.
How big should my solar attic fan be?
For small cabins under 500 square feet, 500-700 CFM is a practical target. Larger cabins often need 800-1,200+ CFM or multiple fans. Pick units with weather-rated housings and realistic performance specs.
Do HRVs or ERVs make sense off-grid?
Yes if you pick compact units that sip power. Some run under 10 watts on low and help control RH in winter without dumping all your heat outside. They are great in tight, cold-climate cabins.
What is the fastest way to dry a cabin after a wet weekend?
Open up on a sunny, breezy day, run solar-driven exhaust full tilt, add a box fan or DC fan to move air along surfaces, and run the dehumidifier during peak sun hours. Dry the cabin envelope first, then dry the gear.
Stop Mold Before It Starts
Off-grid humidity control is not about throwing more gadgets at a damp problem. It is a stack: keep water out with a mold-resistant envelope, move air with passive and solar-driven ventilation, right-size dehumidification for the bad days, and watch RH like a hawk. Hit that 30-50 percent zone, design your walls to dry, and use the sun to do the grunt work. Your cabin stays dry, your lungs stay happy, and mold gets evicted without a security deposit refund. For deeper building details, materials, and small-space tactics, check Howard Environmental’s guides: Mold-Resistant Homes, Mold-Resistant Materials, and Fog-Free Tiny Homes & Vans. If you are stuck, get a pro mold inspection before you start sealing things up. It is a lot cheaper than discovering a spore farm behind your new shiplap.