Imagine walking into your basement or bathroom and spotting a suspicious patch of mold creeping along the wall. It’s not just an eyesore—it’s a problem that can spread quickly if not dealt with properly. Mold is like that unwelcome houseguest who doesn’t just overstay their welcome but also invites their entire crew (in this case, spores) to take over your space.
At Howard Environmental, we understand how overwhelming mold can feel. That’s why we’re here to help you take control with simple, effective DIY fixes. A mold containment barrier is your first line of defense to stop mold from spreading while you plan your next steps. Let’s dive into how to create one, the tools you’ll need, and why containment is crucial for protecting your home and health.
Don’t Let Mold Spread: Why Containment Comes First
When it comes to mold, the old saying “an ounce of prevention is worth a pound of cure” couldn’t be more accurate. Mold spreads through tiny, invisible spores that float through the air or hitch a ride on surfaces. These spores can easily make their way into other parts of your home if you’re not careful. That’s where containment comes in.
By setting up a mold containment barrier, you can:
- Stop the Spread: Prevent spores from traveling to clean areas.
- Protect Your Health: Reduce exposure to airborne mold spores, which can cause respiratory issues and allergies.
- Buy Time: Containment gives you a chance to plan for professional mold removal without making the situation worse.
The Basics of a Mold Containment Barrier: What It Is and Why You Need One
A mold containment barrier is exactly what it sounds like—a physical barrier that isolates the mold-affected area from the rest of your home. Think of it as a quarantine zone for mold, keeping it confined to one space while you figure out your next move.
Containment barriers are especially helpful if:
- The mold is in a high-traffic area, like a hallway or living room.
- You’re waiting for professional help to arrive.
- You’re dealing with a small mold problem and want to prevent it from becoming a big one.
While professional containment setups are more advanced, a DIY barrier is a great temporary solution for homeowners.
What You’ll Need to Build a Mold Containment Barrier at Home
Before you start, gather your materials. The good news? Most of these items are affordable and easy to find at your local hardware store:
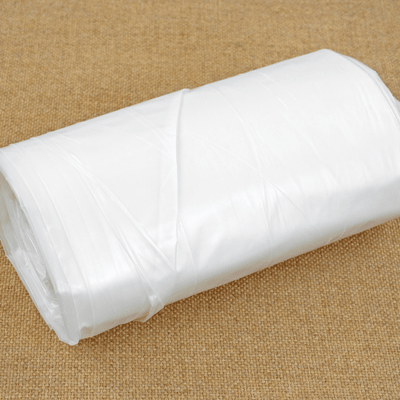
- Plastic Sheeting: Thick plastic sheets (4-6 mil) work best for creating an effective barrier.
- Duct Tape: For securing plastic sheeting and sealing off edges.
- Painter’s Tape: Ideal for covering smaller gaps without damaging surfaces.
- Heavy-Duty Garbage Bags: Perfect for safely disposing of moldy materials.
- Gloves and a Mask: Safety first—protect yourself from direct contact with mold and spores.
- Box Cutter or Scissors: To cut the plastic sheeting to size.
Optional but helpful: a staple gun or clips for extra security when attaching plastic to doorframes or walls.
Seal It Up: How to Build a Mold Containment Barrier in Minutes
Ready to get started? Follow these step-by-step instructions to set up your barrier:
- Identify and Isolate the Area:
Pinpoint the mold-affected zone. Close any doors leading to the area and prepare to seal it off completely. If there’s no door, you’ll need to create a plastic “door” with sheeting. - Cover the Doorway:
- Cut a piece of plastic sheeting large enough to cover the doorway, leaving a few extra inches on all sides.
- Secure it to the doorframe using duct tape, ensuring no gaps remain.
- If you need to access the room, create a slit in the plastic and tape a second layer over it, allowing you to fold it back like a flap.
- Seal Vents and Outlets:
Mold spores can travel through HVAC systems, so cover nearby vents with plastic sheeting and tape. Use painter’s tape to seal off electrical outlets. - Block Small Gaps:
Check for cracks around windows, floorboards, or ceilings. Seal these with painter’s tape or foam strips to prevent spores from sneaking out. - Double-Check Your Work:
Walk around the barrier and inspect for any gaps. A well-sealed containment area will feel airtight.
Avoid These Common Mold Containment Mistakes
Even with the best intentions, it’s easy to make mistakes when setting up a containment barrier. Here’s what to avoid:
- Leaving Gaps: Even a tiny hole in your barrier can let spores escape.
- Skipping Safety Gear: Always wear gloves and a mask when working near mold to protect yourself from exposure.
- Using Flimsy Materials: Thin plastic or weak tape won’t hold up, especially in humid environments.
At Howard Environmental, we often see cases where DIY containment barriers weren’t properly sealed, leading to more extensive mold spread. Take the time to do it right—it’s worth the effort.
DIY vs. Professional Help: Know When to Step Back
While DIY mold containment barriers are a great temporary fix, they’re not a permanent solution. If the mold problem is larger than 10 square feet or you’re dealing with significant health risks, it’s time to call in the professionals. Here’s why:
- Expert Assessment: Professionals can identify the full extent of the problem, including hidden mold you might not see.
- Advanced Containment: They use tools like HEPA filters and negative air machines to contain and remove mold safely.
- Thorough Remediation: Professionals ensure the mold is completely removed and won’t come back.
At Howard Environmental, we specialize in mold inspections and can guide you on the next steps if you’re dealing with a serious issue.
Prevention Is Key: How to Keep Mold Away for Good
Once you’ve contained and removed the mold, prevention becomes your top priority. Here are some tips to keep your home mold-free:
- Fix Leaks Promptly: Whether it’s a dripping pipe or a leaky roof, address water issues as soon as they arise.
- Control Humidity Levels: Use dehumidifiers and aim to keep indoor humidity below 50%.
- Ventilate Properly: Bathrooms, kitchens, and laundry rooms need good airflow to prevent moisture buildup.
- Inspect Regularly: Check areas prone to dampness, like basements and attics, for early signs of mold.
Contain the Mold, Protect Your Home: Take Action Today
Mold can feel like an overwhelming problem, but taking quick action with a DIY containment barrier can make a huge difference. By isolating the affected area and stopping the spread, you’re one step closer to reclaiming your space.
Remember, DIY containment is a temporary fix. For a thorough mold inspection and expert advice, contact Howard Environmental. We’re here to help you protect your home, your health, and your peace of mind.
Let’s tackle this problem together—because when it comes to mold, you don’t have to face it alone.