You know that moment when you open a sippy cup, see mysterious black dots in the valve, and immediately reconsider every life choice that led you here? Welcome to baby gear mold, the tiny terror that loves sugar-milk residue, stale bath water, and any corner your dishwasher can’t quite reach. I run a mold inspection and testing company for a living, so I spend my days finding the stuff you don’t want near your kid’s lungs. Let’s beat baby gear mold for good with baby-safe cleaning, fast-dry setups, and clear rules on when to toss and replace. Yes, with jokes. No, with zero tolerance for mold in your kid’s cup.
Why Baby Gear Mold Hits Hard
Mold isn’t just gross. In kids, it can trigger coughing, allergies, stubborn sinus issues, and it’s linked to a higher asthma risk. Smaller lungs and developing immune systems mean your toddler gets the brunt of it. Add in the fact that babies and toddlers are basically professional droolers who lick their gear for fun, and you’ve got a real health issue when mold shows up in anything that touches mouths or skin. Hidden moisture in bathrooms and kitchens is mold’s favorite hangout, and baby gear spends a lot of time damp. That’s the perfect storm. Not in this house. Not on our watch.
Sneaky Spots Mold Loves
Baby gear mold isn’t picky, but it does have a type. It goes for dark, damp, and sugary. Here’s where it hides and why:
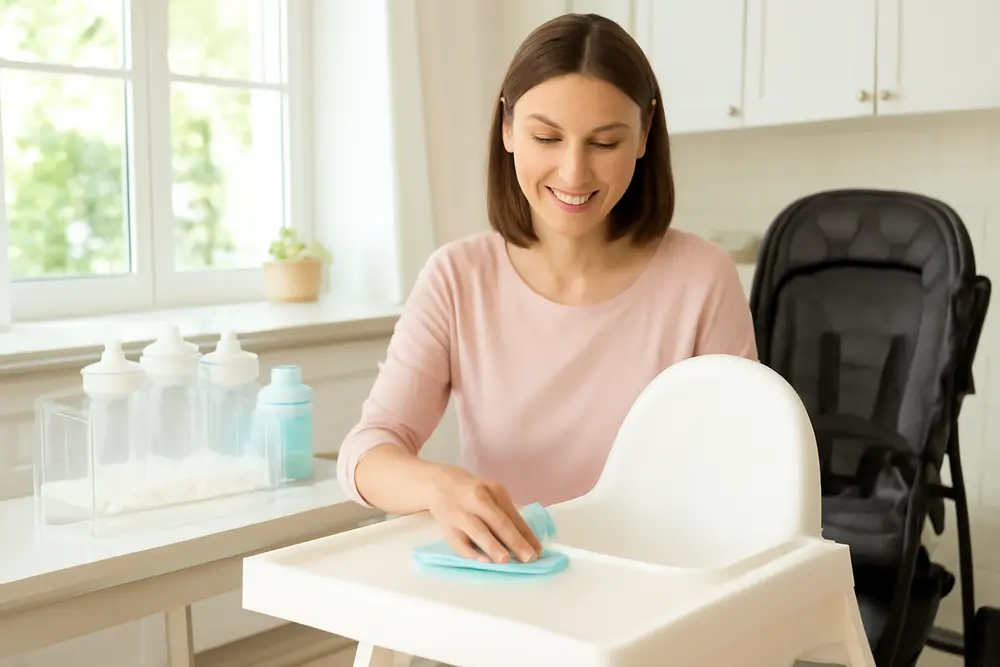
Sippy cups and spill-proof lids. The anti-leak valves, rubber gaskets, weighted straws, and under the spout lip are mold magnets. Milk or juice sugars plus tiny crevices equals a buffet. This is why sippy cup valve hygiene isn’t optional, it’s survival.
Bath toys. Hollow or squirt toys with holes are infamous. Water gets in, doesn’t get out, and you’ve got a mold aquarium. If your kid’s rubber ducky coughs up brown confetti when squeezed, that’s not “vintage charm.” That’s mold.
Bottle racks and drying setups. Flat mats or crowded racks trap water in nipples, lids, and under trays. Standing water in drip trays? Mold’s vacation home.
High-chair cushions and padding. Spills soak in and seams hold moisture. If the cushion smells swampy or stays damp after cleaning, mold is doing push-ups in there.
Daily Habits That Prevent Mold
Prevention is cheaper, faster, and far less gross than scraping mold out of a valve. Set up these habits and watch the problem shrink:
Control humidity. Keep indoor humidity between 30 and 50 percent. Use bathroom fans for 20 minutes after baths, run kitchen ventilation during cooking, and fix leaks quickly. A $10 hygrometer tells you the truth faster than your nose.
Choose simpler gear. The fewer parts and hidden crevices, the better. Solid silicone or sturdy plastic without holes beats anything that relies on magic valves you can’t fully open or clean.
Rinse right after use. Don’t let milk or juice camp out. Disassemble sippy parts immediately and rinse. Fast rinse plus air equals fewer mold spores with dinner plans.
Let it dry completely. Reassembly happens only when everything is bone-dry. If something still feels cool or tacky, it’s not dry enough. Give parts space on an airy rack and keep them out of sealed containers until totally dry.
Baby-Safe Cleaning That Works
Let’s get strategic. These are cleaning approaches I’d use for my own kid’s gear and that line up with safety-forward guidance. Always check your manufacturer’s instructions first.
Sippy Cups And Valves
- Disassemble every single part. Lids, valves, gaskets, weighted straws, the whole cast. If you can’t open or remove the valve, treat the lid as suspect and consider replacing it.
- Soak parts in hot, soapy water for 10 to 15 minutes. Use a mild dish soap. No antibacterial perfumes or harsh cleaners that stick to surfaces.
- Scrub crevices with the right tools. Use a bottle brush for the cup, a narrow valve brush for the anti-leak valve track, and a straw brush for straws. Pay attention to seams.
- Sanitize. Pick one:
- Boil silicone or hard-plastic parts that are boil-safe for 5 minutes. Great for silicone valves and straws.
- Use a steam sterilizer if your gear is rated for it.
- White vinegar soak. 1 part vinegar to 3 parts water for 30 minutes, then scrub and rinse. Vinegar helps remove residue and odors. It is not a hospital-grade disinfectant, but it’s baby-safe and effective for routine maintenance.
- Rinse thoroughly. Soap or vinegar leftovers can affect taste and can irritate sensitive mouths.
- Dry fully. Air-dry on a rack with lots of airflow. Do not reassemble until everything is completely dry.
Pro note on sippy cup valve hygiene: Make it a daily rinse-and-dry ritual and a weekly deep clean. If you repeatedly see spots, stains, or slime in the same crevice, the design may be the issue, not your effort.
Bath Toys
- Right after bath time, squeeze out as much water as possible. Give toys a warm rinse.
- Weekly clean. Soak toys in a solution of 1 tablespoon of unscented household bleach per 1 gallon of water for 2 minutes, then rinse thoroughly and air-dry. Use only unscented bleach and never mix bleach with vinegar or anything else. For parents avoiding bleach, use a 1:3 vinegar-water soak for 30 minutes, scrub, rinse, and sun-dry. Vinegar won’t kill all mold types but helps with routine cleaning and odor.
- Scrub inside. If a toy has a hole, use a small bottle brush or pipe cleaner to scrub internal surfaces after soaking.
- Sunlight assist. Dry toys in bright sunlight when possible. UV plus airflow is a mold dream-crusher.
If you keep finding new gunk after all that, retire the squirty toys with internal cavities and switch to solid, hole-free bath toys. Your tub will cry fewer tears.
Bottle Racks And Drying Mats
- Empty the drip tray daily. Standing water is how mold pays rent.
- Wash the rack and tray weekly with hot, soapy water. If it’s dishwasher-safe, run it on the top rack.
- Sanitize monthly or if you see spots. Quick wipe or soak with a bleach solution of 1 tablespoon per 1 gallon of water. Rinse and let it air-dry fully before loading it back up.
- Upgrade airflow. If items are still wet hours later, your rack is more decorative than useful. Use peg-style or wire racks that lift parts and let air move under and around them.
High-Chair Cushions
- Wipe after every meal with warm, soapy water and a clean cloth. Focus on seams and stitching where crumbs and droplets hide.
- Weekly wash. If the cover is removable, wash with baby-safe detergent on warm or hot. If the cushion is one piece, wipe thoroughly and follow with a sanitize cycle if your washer or dryer supports it.
- Dry fast. Use sunlight, a fan, or a low-heat dryer as approved by the manufacturer. Cushions that stay damp invite mold to set up shop.
- Smell test. If a musty odor returns within a day or two of washing, mold is likely living in the foam or seams. That cushion’s done.
Fast-Dry Setups That Actually Dry
Wet gear is mold’s startup fund. Fix that with a drying zone that moves air and limits crowding.
Split the parts. Store lids, valves, nipples, and straws separately until they’re truly dry. Water trapped under a lid is an all-inclusive for spores.
Elevate everything. Use a peg-tree rack or wire rack that lets air hit all sides. Skip flat silicone mats if they pool water. If you must use a mat, pair it with a small fan nearby.
Rotate gear. Keep backups so today’s cup or bath toys can fully dry while tomorrow’s set goes to work. Rotations beat constant moisture.
Store open. Keep sippy lids unlatched, bottles uncapped, and bath toys in a mesh bag that drains. Never trap damp gear in a closed bin.
Mind the room. If your drying station is near a sink or in a steamy kitchen, run a dehumidifier or increase ventilation. Keep humidity between 30 and 50 percent and mold has a much harder time multiplying.
When To Replace Instead Of Clean
You can be a cleaning champion and still need to say goodbye to certain items. Here’s when cleaning stops being worth it:
Persistent stains or odors. If black spots keep returning or plastic looks pitted and cloudy, microbes are likely lodged in microscopic scratches. Replace.
Uncleanable designs. Hidden valves that don’t fully disassemble, tiny holes you can’t reach, or toys that always hold water. Hollow squirt toys are frequent repeat offenders.
Fabric that won’t quit smelling. If mildew scent returns even after a hot wash and full dry, the cushion foam is contaminated. Time for a new one, ideally a wipeable cover design.
Recall alerts. Some sippy cup designs have been recalled for mold risks in valves. If a brand or model is flagged, retire it, even if yours looks fine.
Make It Manageable On Real-Life Schedules
Parents don’t need another full-time job. Use these time-savers so mold prevention becomes automatic, not another mental load.
Set a rinse station. Put a small bin with warm, soapy water by the sink during the day. Toss in valves and straws as you go, then brush and rinse once at night.
Schedule a weekly deep clean. Pick a day and stick with it. Fifteen minutes max. Disassemble sippy parts, sanitize the drying rack, squeeze and soak bath toys, and wash the high-chair cover.
Tool up. Keep a valve brush, straw brush, and bottle brush in one container. Add a labeled spray bottle with a vinegar solution for quick post-meal wipe-downs. For bleach sanitizing, pre-mix fresh solution only when needed, then discard. Bleach loses strength quickly, so no big-batch storage.
Teach tiny helpers. Toddlers can carry their cup to the sink, place bath toys in the mesh bag, and help hang items on the rack. It builds habits and saves you steps.
Parent FAQ
Is Vinegar Enough To Kill Mold?
Vinegar helps cut residue and smells and can reduce some microbes, but it’s not registered as a disinfectant for all mold types. For hard plastic toys and racks, a properly diluted bleach solution or heat-based methods like boiling or steam are more reliable for sanitizing. For daily upkeep, vinegar is fine, especially when followed by full drying. For a known mold issue, escalate to boiling, steam, or a bleach sanitizing step.
What’s A Safe Bleach Mix For Baby Items?
Use 1 tablespoon of unscented household bleach per 1 gallon of water for hard non-porous items. Soak for about 2 minutes, then rinse thoroughly and air-dry. Only use regular, unscented bleach and never mix bleach with vinegar, ammonia, or any other cleaner. Always ventilate well.
Do Silicone Items Need Special Care?
Silicone handles heat beautifully. Boil for 5 minutes or run through a steam sterilizer. For stubborn spots on silicone, scrub with a paste of baking soda and a little water after soaking. Rinse well and dry completely before reassembly.
Are Squirty Bath Toys Ever Safe?
If they’re brand-new and completely dry inside, you can try sealing the hole with aquarium-grade silicone to make them solid. But honestly, toys without holes are safer long-term. If water gets in and you can’t reach it, mold will eventually RSVP yes.
How Often Should I Deep Clean Sippy Cups?
Daily disassembly and washing is the baseline. Do a weekly deep clean with either a boil, steam, or thorough vinegar soak and scrub. If you use milk or juice, go harder on sippy cup valve hygiene because sugars feed mold quickly.
Why Does My Drying Rack Keep Smelling?
Standing water is likely hiding in the tray or under the pegs. Empty and dry the tray daily, wash the rack weekly, and improve airflow. If odor persists, replace the rack. Consider a rack that elevates parts with wide spacing and minimal flat surfaces.
Could Mold In Baby Gear Mean I Have Mold In My House?
Sometimes baby gear mold is just poor drying. But if you notice musty smells in cabinets, persistent condensation on windows, or visible spots on walls near your kitchen or bathroom, check for leaks or ventilation issues. If you suspect a bigger problem, that’s when pros like us step in to test, locate moisture sources, and map out safe remediation.
Smart Gear Choices That Help
The right gear upfront makes prevention 10 times easier. Look for cups and bottles with fully removable valves and simple lid assemblies. Choose solid bath toys without holes. Pick high-chair cushions with wipeable covers or removable, machine-washable fabric that actually dries in one cycle. Drying racks with tall pegs and a slotted or wire design beat flat mats every day of the week. Non-porous plastic and food-grade silicone beat spongy materials that cling to moisture.
What To Watch While You Clean
Keep a running checklist of red flags. Does the cup valve smell sour even after washing? Are there black pinpoints in the straw you can’t brush out? Is your bath toy spitting suspicious flecks? Does the high-chair cushion still feel damp hours after washing? These are signals to escalate cleaning or switch to gear with better dry-out potential. If you see visible mold growth on multiple items after normal routines, step back and evaluate humidity and airflow in the room itself.
How To Set Up A Mold-Resistant Kitchen Zone
Make your kitchen do some of the work for you. Position your drying rack under a cabinet light or near a gentle airflow path so water evaporates faster. Keep a small fan available for high-volume days. Stash a hygrometer where you can see it, and switch on a dehumidifier if humidity creeps above 50 percent. Keep a clearly labeled caddy with your brushes, vinegar spray, and clean microfiber cloths. If your sink caulk shows dark lines or your backsplash grout darkens repeatedly, clean, dry, and re-caulk as needed so you’re not reintroducing spores from nearby surfaces.
Bath Time Routine That Doesn’t Breed Mold
After the last bubble pop, quickly rinse toys, squeeze out water, and spread them on a slotted soap dish, wire shelf, or a mesh bag hung where air moves. Keep the bathroom fan running for 20 minutes post-bath. Rotate toy sets so each batch gets a full air-dry day. If a toy goes to the moldy dark side more than once, downgrade it to retirement. Bathtime is for splash attacks, not biofilm.
Gear-Specific Red Flags You Shouldn’t Ignore
Sippy cups. Sour smells, speckled valves, cloudy spouts, or gaskets with permanent stains. If a lid won’t open up enough to scrub, it’s the wrong design for your family.
Bath toys. Any discoloration that returns right after cleaning, flecks from the toy when squeezed, or a sweet-musty odor. That odor is mold’s “Hello again.”
Drying racks. Slime or film under the tray and constant wet spots under nipples or lids. If a rack never looks fully dry, it’s time for a rack that breathes.
High-chair cushions. Darkening seams, film that reappears on wipe-down, or a cushion that takes more than a few hours to dry. Moisture that lingers is mold’s gym membership.
What To Do If You’re Overwhelmed
Start small. Today, pick one category. Disassemble and clean sippy parts, upgrade one drying rack, or replace the worst bath toys with solid alternatives. Tomorrow, wash the high-chair cushion and improve airflow. Two or three quick wins knock mold back fast. If you’re seeing mold outside of gear, like on walls, window frames, or under the sink, get a moisture assessment. That’s our turf. We find the source, test when needed, and build a safe plan so the gear you just cleaned stays clean.
Baby gear mold shows up when water lingers, sugar sticks around, and air can’t move. Break that triangle and you win. Keep up daily rinses, weekly deep cleans, smart storage, and gear that actually dries. Your kid gets clean cups, cleaner baths, and lungs that don’t have to fight tiny invaders. And you get to open a sippy cup without bracing for a horror movie reveal. I call that a parenting upgrade worth bragging about.