If your bathroom ceiling has been growing suspicious coffee rings around the exhaust fan, that’s not “mystery humidity” or a haunted shower. That’s your fan duct sweating like a jogger in January. Warm shower steam hits a cold, uninsulated or saggy duct, the vapor condenses, and the water follows gravity right back to your drywall. We test homes every week where the “bathroom mold” is actually a duct problem in costume. The fix starts with correct bathroom fan ducting and a quality backdraft damper that actually closes. Stop the drips and you stop the mold.
Why Your Ceiling Is Crying
Here’s the classic play-by-play. It’s winter, the attic is cold, and your steamy shower is blasting warm, moist air into a metal or thin plastic duct that runs through that cold space. The warm air gives up its moisture on the duct wall, water forms, and drips down. If the duct sags, it pools then dumps. If the fan has no reliable backdraft damper, icy air sinks in when the fan is off, pre-chilling the duct even more, which means maximum condensation the next time you flip the switch. The ceiling around the fan grille gets speckled mold, paint peels, and the attic might even have frosty ducts that thaw and leak.
What Actually Causes Condensation
Condensation is not random. It follows physics and poor decisions. Uninsulated or under-insulated ducts are the headliners. Metal is great at moving heat, which is bad here. A cold metal duct means an instant dew point party. Flex duct that droops or has too much length lets condensate collect in low spots. Improper terminations, like sending that duct into a soffit that feeds your attic or just dumping it into the attic, push moisture into wood and insulation where it breeds mold and rot. Backdrafts through broken or low-grade dampers invite outdoor air in, which chills the duct and feeds the cycle. Short runtimes finish the job. If the fan shuts off right after the shower, moisture lingers on ceilings and grout while the duct water trickles back to your bathroom. Multiple sources recommend running the fan for at least 20 to 30 minutes after a hot shower, and even up to 45 minutes in steamy or winter conditions to clear the load (source).
Bathroom Fan Ducting That Works
Start with smooth, sensible, and insulated. Rigid or smooth-wall metal duct usually moves air better than skinny, wrinkled flex. Size it to the fan. Most fans want a 4 inch duct, higher capacity fans often need 6 inch. Choking a 110 CFM fan down to a 3 inch duct is like putting a snorkel in a coffee stirrer. Keep runs short and avoid hard 90s. Every extra foot and elbow cuts airflow and leaves more cold surface to condense on. Support the duct every few feet to prevent sags. Pitch the duct slightly toward the exterior termination at about 1/4 inch per foot so any condensate drains outside, not back toward the fan box. Seal all joints with mastic and UL 181 foil tape, not cloth duct tape that dries up and falls off. Once it is sealed and sloped, wrap the duct with insulation rated R-6 or better. In cold climates, R-8 is a smart move. Insulate the fan housing cover in the attic if it is exposed to unconditioned space, and air seal the fan box to the ceiling with caulk or foam so you are not drawing attic air into your bathroom. This is the boring stuff that prevents the exciting stuff like ceiling stains.
But What If You Have Flex Duct?
Flex can work if you treat it like a diva. Keep it straight, stretched tight, and as short as possible. Every bend needs to be gentle. Support it every 3 to 4 feet. Insulate over it to at least R-6. If it already looks like a hammock, replace sections or add proper hangers. Flex works best as a short connector to a rigid trunk, not as a 25 foot slip-and-slide across the attic.
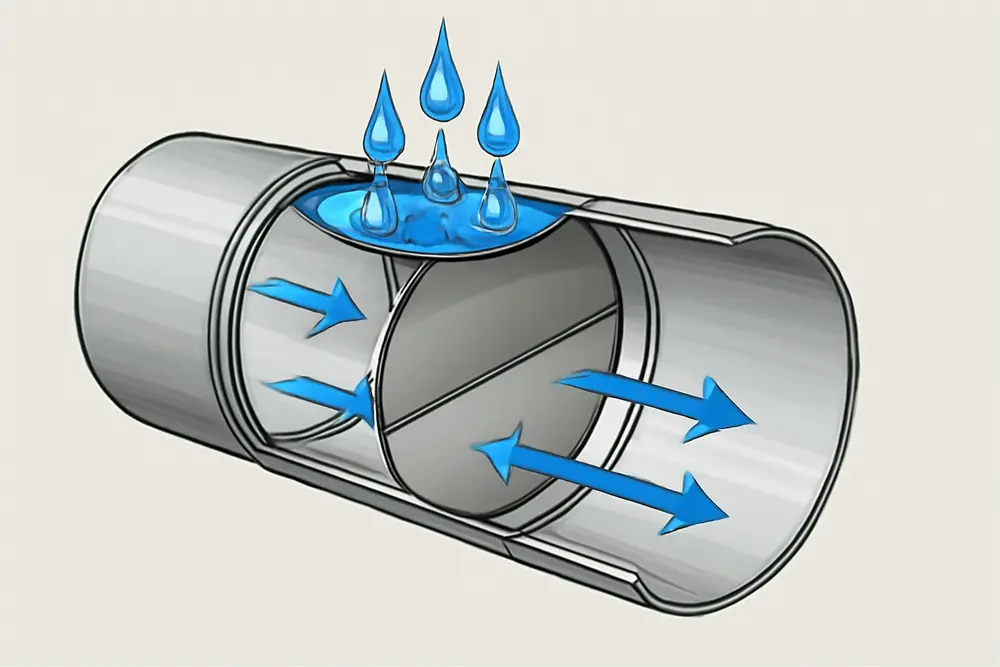
So What Does A Backdraft Damper Do?
Your backdraft damper is the tiny bouncer that keeps cold air, wind, and critters out of your duct when the fan is off. When the damper is missing, stuck, or worthless, icy air spills down the line and chills the duct so it condenses more aggressively the next time you shower. A proper damper closes reliably, opens easily when the fan runs, and seals tight when it stops. Some are gravity flappers, some are spring-loaded metal blades, and some are motorized for airtight closure. In shared or common exhaust configurations, each fan needs its own backdraft damper to avoid other rooms burping their air into yours (Building America Solution Center).
| Damper Type | How It Closes | Why Choose It | Watch Outs |
|---|---|---|---|
| Gravity Flapper | Weight of flap | Simple, cheap, fewer parts | Can stick open in wind, not very tight |
| Spring-Loaded | Spring pulls flap shut | Better seal, resists wind backflow | Needs correct orientation, quality matters |
| Motorized | Powered open or closed | Best seal for long or cold runs | Cost, wiring, failure if not maintained |
Choosing And Installing A Damper
Size the damper to match your duct. A 6 inch fan should not be breathing through a 4 inch damper with a neck-down fitting in between. Look for low cracking pressure so the fan does not struggle to open it. The damper should be near the exterior termination so any condensation in the line drains outward. If you add an inline damper in the attic, make sure it is installed with the arrow pointing out, sealed with mastic, and supported so it does not sag or twist. Check that it swings freely. Manually move the flap and listen for scraping. If it binds, it will stick. For roof or wall caps, pick models with integrated backdraft dampers and a removable bird screen. Make sure the screen is not so fine that lint and dust clog it quickly. A clogged screen acts like a closed damper and will push moisture back into the bathroom. After installation, test flow by placing a tissue at the fan grille while it is running. The tissue should stick firmly. Kill the power and feel for cold air falling through the grille after a minute. If you feel a draft, your damper is not closing right.
Fan Runtime And Controls
The simplest mold hack is free. Run the fan during the shower and for 20 to 30 minutes afterward. In big bathrooms or cold months, push to 45 minutes. Several sources back those numbers for real-world moisture removal (source). If you live with humans who forget things, install a timer switch or a humidity-sensing control that keeps the fan running until levels drop. Size the fan right. A common rule is 1 CFM per square foot of bathroom area, with adjustments for ceilings taller than 8 feet or for enclosed showers or water closets (source). Quiet fans get used more, loud fans get ignored. Give the bathroom make-up air by undercutting the door about 3/4 inch so the fan is not trying to suck air through keyholes. Crack the door after showering to help pull drier hall air through the room while the fan runs.
Where Should The Duct Terminate?
Outside. Not in the attic, not into a soffit that feeds the attic, not into a crawlspace, not into an old roof vent meant for passive attic ventilation. Terminate through a dedicated wall cap or roof cap with an integrated backdraft damper. Venting into the attic drives moisture into framing and insulation which leads to rot and mold migration far beyond the bathroom (source). If you choose a wall cap, locate it away from eaves where wind can blow exhaust right back into attic vents. If you choose a roof cap, use a boot and flashing designed for exhaust terminations, slope the last section of duct slightly to the cap, and seal all penetrations. The roof or wall penetration must be airtight and watertight. Use approved sealants and do not count on a bead of caulk to fix a bad flashing job. Periodically check the cap for stuck flappers, bird nests, or lint layers that block airflow.
Maintenance You Can Actually Do
Twice a year, clean the fan grille and housing. Dust cuts performance which extends runtime which extends condensation risk. Test the backdraft damper by turning the fan off and feeling for cold air at the grille after a minute. If there is a steady draft, inspect the damper at the cap for a broken hinge or stuck flap. In the attic, feel the duct insulation. If it is soggy, you have a condensation or roof leak issue. Re-wrap gaps with R-6 or R-8 duct insulation and re-seal seams with mastic and UL 181 foil tape. Look for sags and fix them with proper hangers. On cold mornings, peek at the roof cap for frost around the termination which can signal a damper stuck open. Keep indoor humidity in the 30 to 50 percent range to slow surface mold growth and make the fan’s job easier (source). And yes, replace that bathroom door sweep that seals like a submarine. Your fan needs air to move air.
Case File: The Drippy Winter Fan
A family called us after their upstairs bath started snowing indoors. After every shower, water dripped from the fan grille onto the vanity. Our inspection found a 20 foot 4 inch flex duct snaking through a 20 degree attic with two belly sags big enough to catch fish. The roof cap damper was a flimsy gravity flapper with a cracked hinge that never closed. The fan was 80 CFM feeding a big bath with a glass shower. Classic condensation factory.
We replaced the fan with a 110 CFM Energy Star model and upsized the duct to a short, rigid 6 inch run for the first 12 feet, then a tightly stretched flex connector to a new spring-loaded roof cap with a real backdraft damper. We pitched the run about 1/4 inch per foot toward the roof cap, sealed all joints with mastic, and wrapped the duct to R-8. We air sealed the fan box to the ceiling drywall and added a 60 minute wall timer, set to 30 by default. We also undercut the bathroom door a bit to improve make-up air.
Result: no more drips, no more coffee rings on the ceiling, and the moisture meter readings on the ceiling drywall dropped back to normal in a week. The attic sheathing around the old termination dried out and the skylight stopped crying at night. The homeowner’s review boiled down to one line: “Apparently my bathroom was breathing through a straw and wearing a crop top in January.” Accurate.
Quick Reference: Bathroom Fan Fixes
Use smooth, correctly sized bathroom fan ducting, keep runs short, and support to kill sags. Insulate to at least R-6, pitch the duct to the exterior at roughly 1/4 inch per foot, and seal with mastic plus UL 181 foil tape. Install a quality backdraft damper near the cap and confirm it shuts tight and opens easily. Terminate at a real wall or roof cap with a damper and serviceable screen. Run the fan during the shower and 20 to 30 minutes after, longer in winter. Size the fan at about 1 CFM per square foot of bath area and give it make-up air under the door.
FAQ: Common Fan Duct Questions
Why is water dripping from my bathroom fan?
Condensation in a cold or sagging duct is draining back toward the fan or pooling until it spills. Pair a properly sloped, insulated duct with a working backdraft damper and adequate fan runtime to stop it.
Do I really need to insulate the duct in a warm climate?
Yes. Even in warmer regions, night temperatures and air conditioning can chill attics enough to create condensation. Insulating the duct keeps its interior surface above the dew point more often, which prevents dripping.
What R-value should I use on the duct?
R-6 is a common minimum. In cold climates, R-8 is better. If the run is long or crosses big temperature differences, go thicker.
Can I vent the fan through a soffit?
No, not if that soffit communicates with the attic or sits near intake vents. You will blow moist air right back into the building. Use a dedicated wall cap or roof cap with a backdraft damper.
How long should I run the fan after a shower?
Plan for 20 to 30 minutes after the shower, and up to 45 minutes in winter or for large bathrooms. Consider a timer or humidity-sensing switch so you are not babysitting the button (source).
How big should my bathroom exhaust fan be?
A common rule is 1 CFM per square foot of bathroom area. Adjust for higher ceilings, enclosed toilet rooms, or long, restrictive duct runs that raise static pressure (source).
How do I know if the backdraft damper is working?
With the fan off, put your hand near the grille. You should not feel a steady cold draft. Go outside and check the cap while the fan runs. The flap should open easily and evenly. If it rattles in light wind or hangs crooked, replace it.
Is flex duct bad for bathroom fans?
It is not evil, it is just needy. Keep it short, stretched tight, supported, and insulated. For long or cold runs, rigid or smooth-wall metal duct is better for airflow and condensation control.
Want Help Stopping Ceiling Mold Before It Starts?
If you are staring at a suspicious ceiling spot or hearing drips plunk into your tub, we can inspect the fan, duct, and termination, check moisture levels, and map a fix. Bathroom mold is usually a symptom, not the root cause. We chase the cause. And yes, we install backdraft dampers that actually stop duct drips.
Useful reads if you like receipts: proper damper use in shared ducts from the Building America Solution Center, mold prevention tips including sizing and humidity targets from BioRestore, runtime recommendations discussed by Plating Technologies, and a reminder of the consequences of venting into attics from Patriot Property Pros. That stack of boring best practices is how you keep your ceiling dry and your inspector out of your bathroom on Saturday morning.